
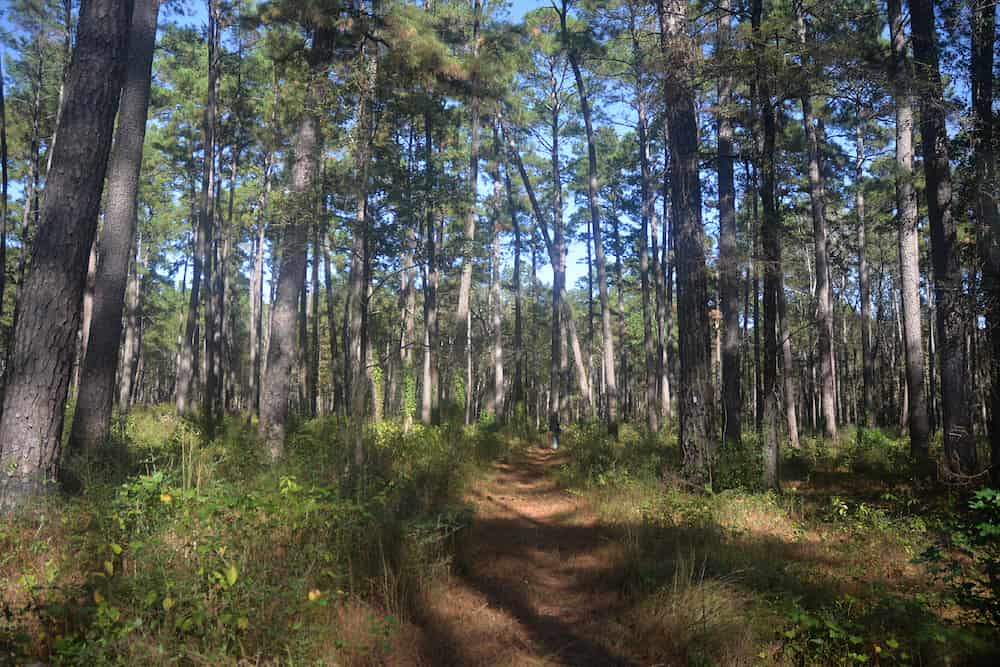
Important Note for Beginners: This itinerary is designed for hikers without trail legs, starting conservatively with 10-mile days and building gradually. The Lone Star Trail is mostly flat with gentle elevation changes, perfect for your first long-distance hike!
Also should you be planning to hike in hunting season you are only allowed to stay in designated hunter camps and no other trail camping.
Day-by-Day Breakdown
Day 1: TH1 (Richards) to Little Lake Creek Wilderness Camp
- Distance: 6.5 miles
- Elevation Gain/Loss: ~150 ft gain / ~130 ft loss
- Difficulty: Easy – Great first day!
Route Highlights:
- Start at Trailhead #1 near Richards, TX
- Pass through Little Lake Creek Loop intersection (0.13 mi)
- Enter the Little Lake Creek Wilderness (3.45 mi)
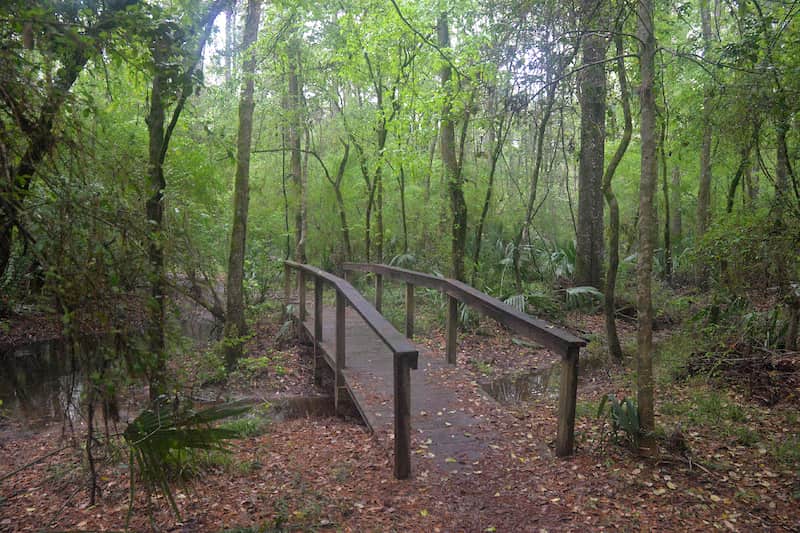
- Multiple creek crossings with boardwalks
Water Sources:
- Emergency pond at 0.33 mi (3 DROPS – poor quality)
- Good pond at 2.55 mi (5 DROPS)
- Clear spring-fed creek at 3.95 mi (4 DROPS)
- Little Lake Creek at 5.8 mi (1 DROP)
Camping: Designated Primitive Camp – “Little Lake Creek Wilderness Camp” at mile 6.5 (125 yards north on FS 231)
Notes: Take it easy your first day. Get a feel for your pack weight and pace. This shorter day lets you shake out any gear issues early.
Day 2: Little Lake Creek Camp to Stubblefield Campground
- Distance: 13.2 miles
- Elevation Gain/Loss: ~380 ft gain / ~350 ft loss
- Difficulty: Moderate – Building mileage
Route Highlights:
- Cross FM 149 at mile 8.7 (TH3)
- Intersect Little Lake Creek Loop Trail terminus (11.8 mi)
- Bridge over Caney Creek (11.9 mi)
- Beautiful views of Lake Conroe (16.6 mi)
- Cross Quicksand Creek (17.9 mi)
Water Sources:
- Hidden pond at 9.76 mi (4 DROPS – 150 yards off trail)
- Caney Creek at 11.9 mi (2+ DROPS)
- Lake Conroe at 16.6 mi (5 DROPS)
- Quicksand Creek at 17.9 mi (4 DROPS)
Camping: Stubblefield Campground at mile 19.7
- Cost: $15/night
- Amenities: Showers, restrooms, potable water, electricity
- Often has a campground host
Notes: Your first full day! The Stubblefield Campground is a great reward with hot showers. You’ve earned it. Stock up on water here—it’s reliable and potable.
Day 3: Stubblefield Campground to Huntsville State Park (NERO/ZERO Option)
- Distance: 15.3 miles (to park entrance) + 2-2.5 miles into park = ~17-18 miles total
- Elevation Gain/Loss: ~420 ft gain / ~390 ft loss
- Difficulty: Moderate
Route Highlights:
- Long road walk on old Bath Lane section (1.5 miles on road at mile 26.4)
- Camelia Lake dam crossing at mile 32.0 (can be slippery after rain!)
- Follow Alligator Creek for ~1 mile (beautiful creek walk)
- Arrive at I-45 crossing at TH7 (mile 35.0)
Water Sources:
- Fern Creek at 24.0 mi (3+ DROPS – more reliable than most)
- West Huntsville Camp pond at 28.9 mi (3 DROPS – poor quality)
- Camelia Lake at 32.0 mi (5 DROPS – but avoid due to fertilizer/pesticides)
- Alligator Creek at 33.2 mi (4 DROPS – spring-fed, good quality!)
RESUPPLY OPPORTUNITY – HUNTSVILLE STATE PARK: At mile 35.0, you reach TH7 at I-45. Turn RIGHT on Park Road 40 to enter Huntsville State Park (2-2.5 miles each way off trail).
Huntsville State Park Amenities:
- Camping (developed sites with fees)
- Hot showers and restrooms
- Potable water and vending machines (Coke machine!)
- Small concession stand (may be seasonal)
TOWN OPTION – HUNTSVILLE, TX: From TH7, Huntsville is ~6 miles into town via Park Road 40 and US 75. You can:
- Hitch or rideshare into town
- Zero Day Option: Get a hotel, resupply at grocery stores, do laundry, eat real food!
- NERO Option: Spend afternoon/evening in town, return to trail next morning
Hotels in Huntsville ($70-120/night):
- Hampton Inn & Suites Huntsville
- Days Inn & Suites
- Best Western Huntsville Inn & Suites
- Super 8 by Wyndham
- Quality Suites near University
Resupply Options:
- Walmart Supercenter (24 hours)
- Brookshire Brothers
- Various grocery stores
- Restaurants all over town
Decision Point:
- Push through: Camp at Huntsville State Park (extra 4-5 miles round trip), resupply at park store
- NERO: Stay in park, hitch into town for dinner/supplies
- ZERO: Get hotel in Huntsville, full rest day, resupply, return to trail tomorrow
Notes: This is your MAJOR resupply opportunity! Even if you carried enough food from the start, consider at least visiting Huntsville State Park for showers and fresh water. Many thru-hikers take a zero or nero here—you’re at the perfect mileage to need a break.
Day 4: Huntsville State Park to East Four Notch Camp
- Distance: 15.6 miles (from Park Road 40 trail re-entry)
- Elevation Gain/Loss: ~450 ft gain / ~420 ft loss
- Difficulty: Moderate – Longer day through Four Notch area
Route Highlights:
- Long road walk section: 2.4 miles on paved Four Notch Road (mile 42.0-45.0)
- Enter Four Notch Loop area
- Traditional HALFWAY POINT at mile 48.0!
- Boswell Creek crossing at 48.2 mi (can be tricky when raining)
- Follow and cross Briar Creek (49.6-49.9 mi)
Water Sources:
- Very limited in Phelps Section!
- Small intermittent stream at 40.7 mi (1/2 DROP – not reliable)
- Intermittent creek at 47.0 mi (2 DROPS – poor quality)
- Boswell Creek at 48.2 mi (3+ DROPS – fairly reliable)
- Brandy Creek at 51.1 mi (1 DROP)
Camping: Designated Primitive Camp – “East Four Notch Camp” at mile 51.3
- Pond nearby at 51.5 mi (3 DROPS)
Notes: Celebrate the halfway point! Water is scarce in the Phelps Section, so tank up at Alligator Creek or carry extra from Huntsville State Park. The Four Notch road walk can feel long but gives your feet a break from trail.
Day 5: East Four Notch Camp to Big Woods Trail Camp
- Distance: 8.5 miles
- Elevation Gain/Loss: ~240 ft gain / ~220 ft loss
- Difficulty: Easy-Moderate – Shorter recovery day
Route Highlights:
- Long road walk section (2.7 miles) starting at mile 51.7
- Enter Big Woods Section at mile 54.2
- Cross West Fork Caney Creek at 56.9 mi
- Many small creek crossings (mostly dry)
Water Sources:
- CRITICAL: Very limited water in this section!
- Off-trail pond at 58.5 mi (4 DROPS) – 100 yards east down fire break, then 30 yards south
- This is the ONLY water between miles 51.5 and 71 in dry conditions!
Camping: Designated Primitive Camp – “Big Woods Trail Camp” at mile 59.8
- Camp is 100 yards north on FS202D from the trail intersection
Notes: Shorter mileage day to recover from yesterday. WATER IS CRITICAL—make sure you fill up at the off-trail pond at 58.5 mi even if you don’t think you need it. In dry conditions, your next reliable water is almost 20 miles away!
Day 6: Big Woods Camp to Double Lake Recreation Area
- Distance: 15.2 miles
- Elevation Gain/Loss: ~410 ft gain / ~380 ft loss
- Difficulty: Moderate – Final push to Double Lake
Route Highlights:
- Exit Big Woods at TH9/Ira Denson Lane (62.8 mi)
- Long road walk: ~5 miles total (Church water at Evergreen Baptist Church)
- Begin Magnolia Section (67.4 mi) – terrain changes, many magnolia trees!
- East Fork San Jacinto River crossing at 71.1 mi (bridge washed out – ford can be hazardous in high water!)
- Arrive at Double Lake Recreation Area (75.0 mi)
Water Sources:
- Evergreen Baptist Church outside water tap at Highway 150 (5 DROPS – church has given permission)
- Intermittent stream in Magnolia Section at 68.6-69.5 mi (1+ DROP)
- East Fork San Jacinto River at 71.1 mi (5 DROPS – permanent flow but ford crossing)
- Small intermittent stream at 72.2 mi (4 DROPS)
- Double Lake at 75.0 mi (5 DROPS – potable water available!)
Camping: Double Lake Recreation Area at mile 75.0
- Cost: Fee-based camping
- Amenities: Restrooms, hot showers (!), potable water, trash service
- This is your second “luxury” stop!
Notes: The road walk through Evergreen is long but breaks up the day. Fill up at the church! The East Fork crossing can be dangerous after heavy rain—if water is high, consider the bypass route (begins at 69.9 mi on Freeside Lane). Double Lake showers are heavenly after 6 days on trail!
Day 7: Double Lake Recreation Area to TH15 (Finish!)
- Distance: 21.4 miles
- Elevation Gain/Loss: ~580 ft gain / ~560 ft loss
- Difficulty: Moderate-Challenging – Long final day, but you’ve got trail legs now!
Route Highlights:
- Big Creek Scenic Area (78.6-80.8 mi) – beautiful creek crossings, elevated tramways
- Trail follows old railroad tramway for miles (arrow straight!)
- Cross FM 2666 at TH13 (82.5 mi)
- Follow Tarkington Bayou (often dry) for ~3 miles (84.2-87.2 mi)
- Cross FM 2025 at TH14 (90.9 mi)
- East Fork San Jacinto River bridge (92.5 mi) – steel truss, always has water!
- Winters Bayou iron bridge (95.8 mi)
- FINISH LINE: Trailhead #15 at mile 96.44!
Water Sources:
- Big Creek at 75.7-79.7 mi (3-5 DROPS – semi-permanent flow, multiple bridges)
- IMPORTANT: After Big Creek (79.7 mi), very limited water for next 13 miles in dry conditions!
- Tarkington Bayou usually dry (1/2 DROP)
- Ponds at 85.0 mi and 86.8 mi (3 DROPS each)
- East Fork San Jacinto at 92.5 mi (5 DROPS – always has water!)
- Pond at 93.95 mi (3 DROPS)
- Winters Bayou at 95.8 mi (5 DROPS – always has water!)
Camping Options if Needed:
- Designated Primitive Camp “Tarkington Camp” at 83.55 mi (100 yards east of trail)
- Designated Primitive Camp “Mercy Camp” at 89.1 mi (short trail to north)
Finish Line: Trailhead #15 near Montague Church, FM 1725, Cleveland, TX
Notes: This is a LONG final day, but you’ve built up your trail legs! If 21 miles feels like too much, consider camping at Mercy Camp (89.1 mi) and finishing with an easy 7-mile day tomorrow. Tank up on water at Double Lake and Big Creek—carry extra for the dry sections ahead.
Post-Trail Logistics:
- You’ll need pre-arranged shuttle, rideshare, or ride back to TH1 (Richards) to retrieve your vehicle, or have someone pick you up at TH15
- Cleveland, TX is the nearest town (~10 miles) if you need emergency services or celebration dinner!
Alternative 5-Day Itinerary (Faster Pace)
For stronger hikers or those building trail legs quickly:
- Day 1: TH1 to Stubblefield Campground (19.7 mi)
- Day 2: Stubblefield to Huntsville State Park area (15-18 mi) – NERO/ZERO option
- Day 3: Huntsville State Park to Big Woods Camp (24 mi)
- Day 4: Big Woods to Double Lake (15.2 mi)
- Day 5: Double Lake to TH15 finish (21.4 mi)
Important Planning Notes
Water Strategy (DROPS Rating System)
The trail uses a DROPS rating (1-5) indicating water reliability during droughts:
- 5 DROPS: Highly reliable, even in severe drought
- 4 DROPS: Usually reliable
- 3 DROPS: Moderate reliability
- 2 DROPS: Often dry in drought
- 1 DROP: Rarely reliable
Always carry water treatment! Most sources are stagnant ponds or slow creeks. Sawyer Squeeze, Katadyn BeFree, or tablets recommended.
Resupply Strategy
Option 1 – Carry Everything: If doing the trail in 5-7 days, many hikers carry all food from start. This avoids logistics but means heavy pack initially.
Option 2 – Huntsville Resupply: The most popular option! Take a zero or nero in Huntsville (Day 3) to:
- Reduce initial pack weight
- Get hot shower and real bed
- Buy fresh food for second half
- Do laundry and charge electronics
- Recover before tackling the back half
Option 3 – Cache Strategy: Some hikers pre-cache food/water at road crossings. Requires advance trip but reduces pack weight.
Option 4 – Support Crew: Have friends/family meet you at trailheads with resupply. TH7 (Huntsville), TH10, TH14 are good spots.
Camping Regulations
Hunting Season (Sept 26 – Jan 8):
- Camping restricted to DESIGNATED camps only
- Wear bright/hunter orange clothing
- Most thru-hikers avoid this season
Rest of Year:
- Primitive camping allowed anywhere along trail
- Practice Leave No Trace principles
- Camp 200+ feet from water sources when possible
Town Access Summary
Richards (Start – TH1):
- Small town, limited services
- Gas stations, convenience stores
- ~1.5 hours north of Houston
Huntsville (Mile 35 area):
- BEST RESUPPLY OPTION
- Full grocery stores, hotels, restaurants
- 6 miles from TH7
- Population ~45,000 (college town)
Evergreen (Mile 62.8 area):
- Tiny community on Highway 150
- Baptist Church water tap (with permission)
- Limited/no services
- Can hitch to Huntsville or Coldspring
Cleveland (Finish – near TH15):
- Town ~10 miles from TH15
- Full services if needed post-trail
- Population ~8,000
Gear Recommendations for Beginners
Essential:
- Water filter + backup purification tabs
- Good rain gear (afternoon thunderstorms common)
- Trekking poles (helps with balance, creek crossings)
- Bug spray + head net (mosquitoes, ticks common)
- Gaiters (trail can be overgrown in sections)
- Comfortable broken-in boots/shoes
Nice to Have:
- Water storage: 4L capacity minimum for dry sections
- Camp chair or sit pad (long days!)
- Battery bank for phone/GPS
- Offline maps (AllTrails, Gaia GPS, or lonestartrail.org GPX file)
Navigation
The LSHT is VERY well marked with:
- White 2″x4″ aluminum blazes
- Frequent mileage markers on trees
- Good signage at intersections
You’d have to work hard to get lost! Still recommended:
- Download offline maps before you start
- Screenshot the trail guide from lonestartrail.org
- Consider bringing the official guidebook
Shuttle Options
- Lone Star Trail Shuttle Volunteers: Check the Lone Star Hiking Trail Facebook group—volunteers often offer shuttles between trailheads for donation/tip
- Rideshare: Uber/Lyft available in Huntsville area
- Self-Shuttle: Drop car at end (TH15), rideshare to start (TH1), costs ~$80-100
Final Tips for Beginners
- Start slow: Don’t feel pressured to do big miles early. 10-mile days are perfectly respectable!
- Take the Huntsville option: A zero or nero at Day 3 can completely refresh you for the second half.
- Water is key: The LSHT has less reliable water than many trails. Always know where your next water source is and carry extra capacity.
- Embrace the flat: Unlike mountainous trails, the LSHT elevation is gentle. You can make good time once you have trail legs!
- Watch the weather: Texas storms can be intense. If rain is forecast, be prepared for creek crossings to be more challenging.
- Join the community: The Lone Star Hiking Trail Facebook group is incredibly helpful and friendly. Trail angels are active!
- Enjoy the solitude: The LSHT is much less crowded than famous trails like the AT or PCT. Savor the peaceful East Texas forest!
You’ve got this! The Lone Star Hiking Trail is a fantastic beginner-friendly thru-hike. Take your time, stay safe, and enjoy Texas’s longest footpath. Happy hiking! 🥾🌲
Note: All mileages, elevations, and DROPS ratings based on the Lone Star Hiking Trail Club’s official thru-hiker guide (revised August 2024). Always check current trail conditions before departure.