
When you’re standing at the trailhead of your first long-distance hike, the concept of walking hundreds or thousands of miles through wilderness can feel overwhelming. How do you know you’re going the right way? The answer lies in a simple but critical system: trail blazes.
What Is a Trail Blaze?
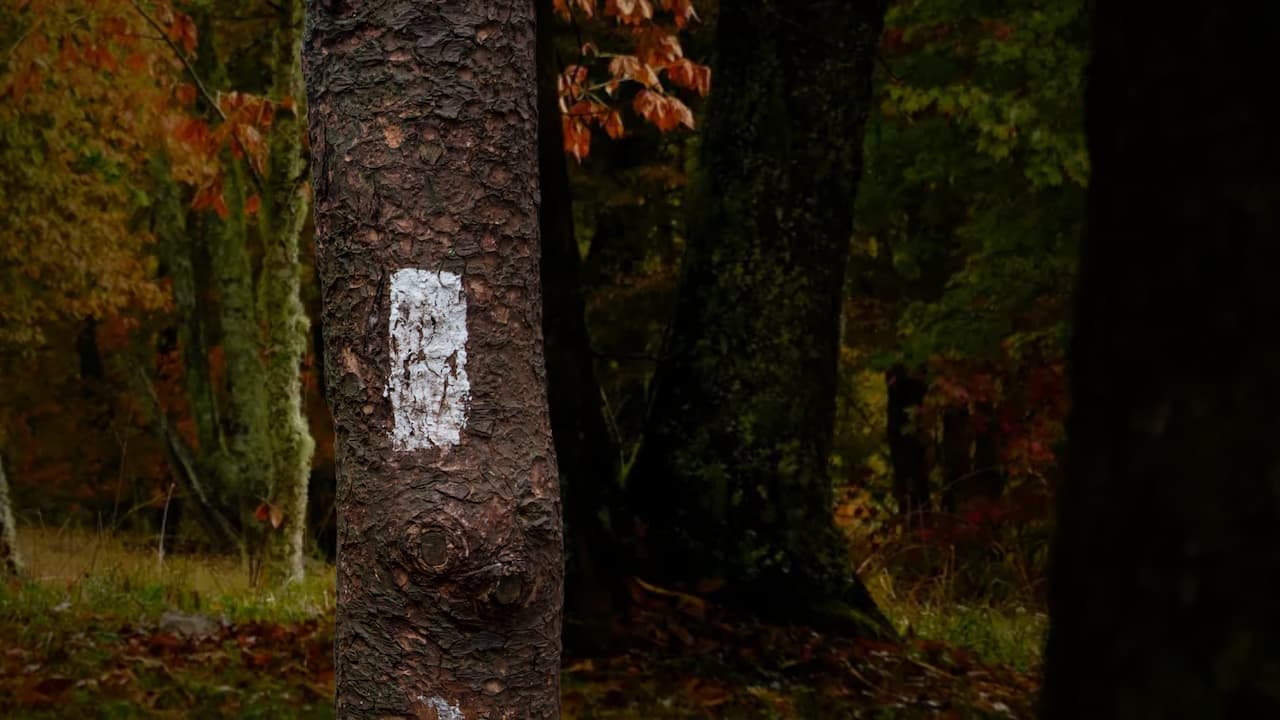
A trail blaze is a painted mark, typically a rectangular shape, placed on trees, rocks, or posts to guide hikers along an established trail. Think of them as breadcrumbs leading you through the forest. These markers are your primary navigation tool, especially on trails like the Appalachian Trail, Pacific Crest Trail, and Continental Divide Trail.
The standard blaze is usually 2 inches wide and 6 inches tall, painted at roughly eye level so hikers can spot them easily while walking. The color varies by trail. The Appalachian Trail uses white blazes, the Pacific Crest Trail isn’t heavily blazed but uses markers at key junctions, and many regional trails use their own color-coding systems, like blue for side trails or yellow for connector paths.
Why Blazes Matter
Without blazes, even experienced hikers could easily wander off-trail, especially in areas where the footpath isn’t obvious. Blazes prevent you from getting lost, save time and energy, and provide reassurance that you’re heading in the right direction. On a thru-hike spanning months, these simple painted rectangles become your most trusted companions.
Trails pass through diverse terrain: dense forests where the path disappears under leaves, open meadows where routes aren’t obvious, rocky scrambles, and areas recovering from wildfires or storms. Blazes provide continuity through all these changes, marking the official route even when conditions make the trail hard to follow.
Types of Trail Markers
Standard Blazes
The single vertical blaze is your baseline marker. When you see one, you’re on the correct trail. These appear regularly, typically every 50 to 100 feet in forested areas, though spacing increases in open terrain where the route is obvious.
Double Blazes (Warning Markers)
Two blazes stacked vertically signal an upcoming change or alert. This could mean a sharp turn ahead, a confusing intersection, a change in terrain, or simply a heads-up to pay closer attention. If you see double blazes, slow down and look carefully for the next marker indicating your route.
Some trails use offset double blazes (two blazes where the top one is shifted left or right) to indicate the direction of a turn. The higher blaze points the direction you should go.
Side Trail Blazes
Many trails use different colored blazes for side trails leading to water sources, shelters, viewpoints, or alternate routes. Blue is the most common color for side trails, though this varies by region. Always note the color system for your specific trail before starting.
Rock Cairns
In areas above treeline or across rocky terrain where trees are scarce, cairns (carefully stacked piles of rocks) serve as trail markers. These human-made rock piles vary in size from small stacks to substantial towers, depending on the terrain and visibility needs.
Never knock down a cairn, even accidentally. What seems like a random pile of rocks might be someone’s lifeline in poor weather or failing light. Conversely, don’t build cairns randomly, as this can create confusion about the actual trail route.
Paint Blazes on Rock
In rocky or alpine environments, you’ll often see painted blazes directly on boulders or rock faces. These work exactly like tree blazes but are adapted to the available surfaces. Colors may fade faster on rock due to weather exposure, so stay alert for faint markings.
Wooden Posts and Signs
At trail junctions, road crossings, and key decision points, you’ll find wooden posts or signs with trail names, distances, or directional arrows. These complement the blaze system and help confirm you’re making the right choice at intersections.
Flagging and Temporary Markers
During trail maintenance or in areas of recent reroutes, crews may use colored ribbons or plastic flagging tied to branches as temporary markers. These help during transition periods but shouldn’t be relied upon as permanent navigation aids.
Reading the Blaze Pattern
Experienced thru-hikers develop a rhythm of blaze awareness. You should be able to see the next blaze from the current one, or at least spot it within a short distance of walking. If you’ve gone several minutes without seeing a blaze, stop immediately.
The three-minute rule is a good guideline: if you haven’t seen a blaze in three minutes of walking, you may have left the trail. Turn around and backtrack to the last blaze you saw, then look more carefully for the next marker.
What to Do When Blazes Disappear
Sometimes blazes fade, get covered by vegetation, or are missing due to fallen trees or vandalism. If you can’t find the next blaze:
Stop and scan systematically. Look left, right, behind you, and even down at your feet. The path itself may be obvious even without a blaze.
Look for the tread. The trail’s footpath, called the tread, often remains visible through worn soil, trampled vegetation, or the absence of undergrowth.
Check your map and GPS. Your guidebook, GPS device, or phone app can confirm whether you’re still on route.
Trust your last known position. Return to the last blaze and search more carefully from that point.
Special Considerations
Weather and Visibility
In fog, heavy rain, or snow, blazes become harder to spot. Carry a headlamp with fresh batteries for low-light conditions, as blazes often reflect light, making them easier to see with artificial illumination.
Faded or Damaged Blazes
Older sections of trail may have faded blazes. Train yourself to spot variations in color and shape. A faint rectangular outline on a tree is still a blaze.
Private Property and Road Crossings
Blazes continue across roads, through towns, and even across private property where trails have easements. If you’re uncertain, look on the opposite side of a road or open area for the continuation of blazes.
Different Trail Systems
Before starting any thru-hike, research that specific trail’s marking system. Some trails are meticulously blazed, while others rely more heavily on cairns, posts, or even minimal marking in certain sections. The Pacific Crest Trail, for example, uses fewer blazes than the Appalachian Trail and depends more on clear tread and strategic markers.
Building Your Navigation Skills
While blazes are essential, don’t rely on them exclusively. Carry paper maps, download offline GPS maps, and learn basic navigation skills. Understanding how to read topography and use a compass provides backup when blazes fail you.
Pay attention to natural navigation clues too: the direction of water flow, the position of the sun, and the general lay of the land all provide context that complements the blaze system.
The Etiquette of Blazes
As a thru-hiker, you’re part of a community that depends on these markers. If you notice a severely faded or missing blaze in a confusing area, consider reporting it to the trail maintaining organization. Most trails have volunteer systems that handle maintenance and repainting.
Never paint your own blazes or alter existing ones. Trail marking is done by trained volunteers following specific standards to maintain consistency and prevent confusion.
Final Thoughts
Blazes transform wilderness into navigable pathways, allowing thousands of hikers to safely complete long-distance journeys each year. By understanding how to read and follow these markers, you’re equipping yourself with one of the most fundamental skills of thru-hiking. Trust the blazes, but verify with other tools. Stay alert, maintain awareness, and let these simple painted rectangles guide you toward your goal, one white rectangle at a time.