
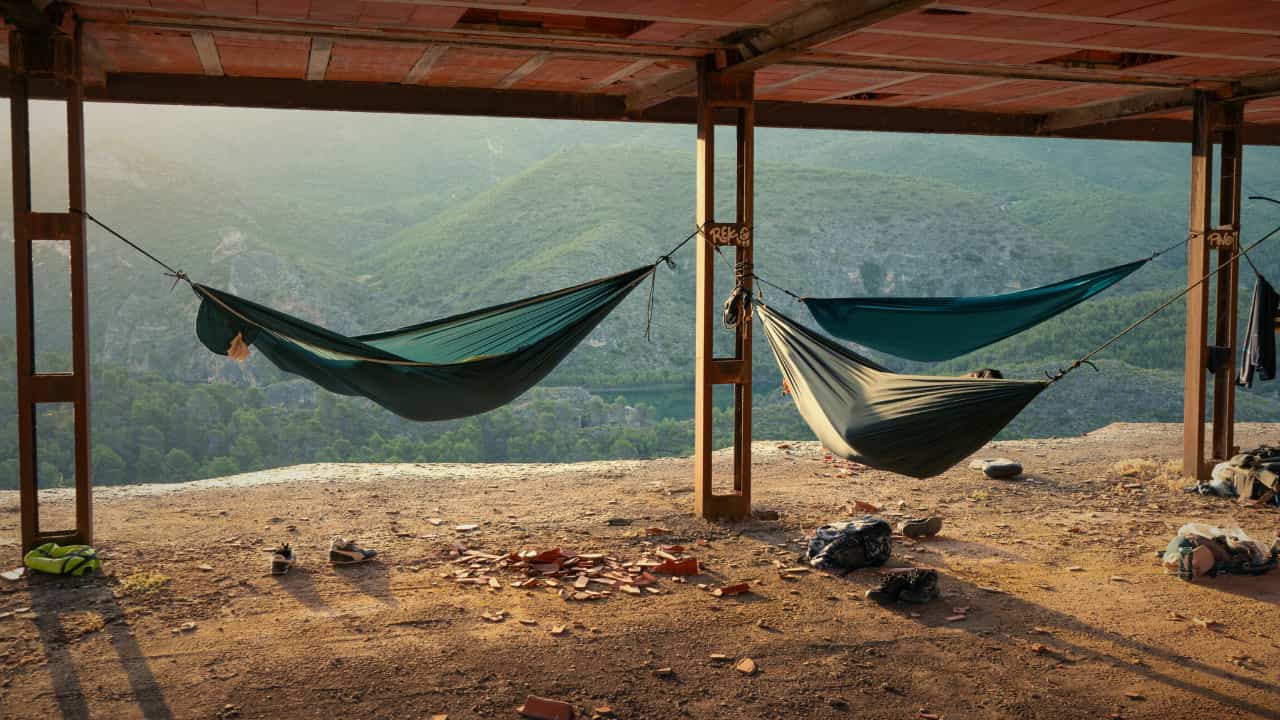
When you’re planning your first thru-hike, one of the biggest decisions you’ll face is how you’re going to sleep each night. While tents have traditionally dominated the trail, hammock camping has surged in popularity among long-distance hikers. If you’ve seen photos of colorful cocoons strung between trees or heard fellow hikers raving about “going to ground,” you might be wondering what all the fuss is about.
This guide will walk you through everything you need to know about hammock camping as a thru-hiker, from the basic concept to the essential gear that makes it work.
What Is Hammock Camping?
At its core, hammock camping means sleeping suspended between two anchor points, typically trees, rather than on the ground in a tent. Your hammock becomes your bed, held aloft by a suspension system, while a tarp protects you from rain and wind overhead. When properly set up with insulation, a hammock creates a complete sleep system that keeps you dry, warm, and comfortable throughout the night.
Unlike casual backyard hammocking, backpacking hammocks are specifically designed for camping. They’re lightweight, durable, and built to integrate with weather protection and insulation systems. Most measure between 10 and 11 feet long and are made from ripstop nylon or similar lightweight materials.
Why Thru-Hikers Choose Hammocks Over Tents
The decision between a hammock and a tent is deeply personal, but hammocks offer several distinct advantages that appeal to long-distance hikers:
Terrain flexibility is perhaps the biggest benefit. While tent camping requires relatively flat, clear ground free of rocks and roots, hammocks only need two sturdy trees spaced 12 to 15 feet apart. On trails like the Appalachian Trail, where flat campsites can be scarce and rocky terrain is common, this flexibility is invaluable. You can camp on slopes, over boulder fields, or in areas where pitching a tent would be impossible or uncomfortable.
Comfort is another major draw. Many hikers find sleeping in a hammock more comfortable than lying on the ground, especially after a long day of hiking. There are no rocks or roots digging into your back, and the gentle sway can be remarkably soothing. Your sleep position matters, though. The key is to lie at a slight diagonal angle rather than straight down the center, which allows your body to flatten out naturally.
Easy setup and takedown can save you precious minutes at the end of exhausting hiking days. Once you get the hang of it, most hammock systems can be set up in under five minutes. There’s no wrestling with tent poles, no searching for stakes, and no worrying about getting everything perfectly taut.
Keeping dry is simpler in many ways. Your sleeping area is elevated off wet ground, so you don’t have to worry about water pooling under your shelter during heavy rain. Morning dew on your tarp is easier to shake off than a wet tent floor.
Versatility in camp spots means you can sometimes find stealth camping locations that wouldn’t work for a tent. The smaller footprint between trees can make hammock setups less visible and more adaptable to various environments.
Essential Hammock Hardware: The Suspension System
Your suspension system is what actually attaches your hammock to trees and bears your weight throughout the night. This is separate from the hammock itself and is critical for safe, successful hammock camping.
The most popular suspension method among thru-hikers uses tree straps (also called webbing). These are wide, flat straps that wrap around trees without causing damage to the bark. The width distributes pressure and protects the tree, which is why thin rope or cord is generally discouraged and even prohibited in some areas.
Most modern systems use continuous loop straps with multiple attachment points, giving you fine-tuned adjustment options to get your hang angle just right. Popular brands include ENO Atlas straps and Dutchware gear, though many manufacturers now include compatible straps with their hammocks.
Your suspension typically includes carabiners or integrated attachment hardware to connect the straps to your hammock’s end loops. Some systems use whoopie slings, structural ridgelines, or other specialized hardware, but tree straps with simple carabiner connections are the most beginner-friendly option.
The proper hang angle is crucial for comfort. You want your hammock to have about a 30-degree angle from the anchor points, creating a gentle curve rather than a tight banana shape or loose drooping line.
The Tarp: Your Overhead Protection
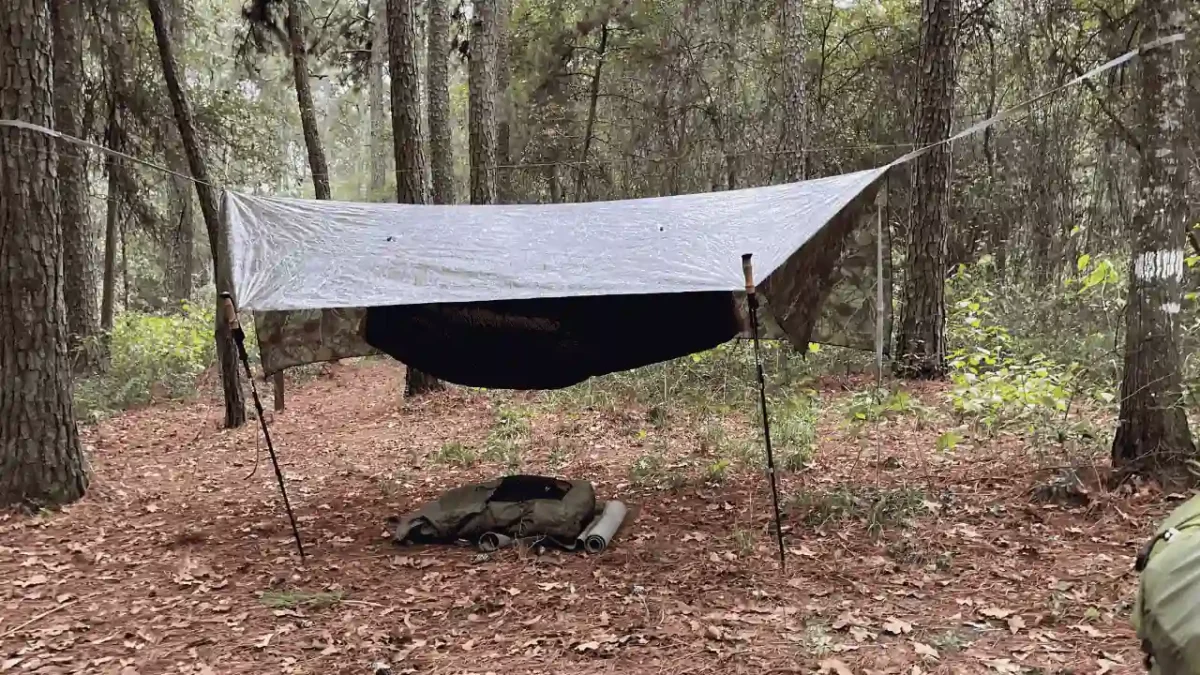
Your tarp is your roof, protecting you from rain, wind, and morning dew. Unlike a tent’s integrated design, hammock tarps are separate pieces of gear that require their own setup.
Most thru-hikers use 11-foot tarps as the standard size, though 10-foot and 12-foot options exist. An 11-foot tarp provides solid coverage for most hammocks and weather conditions without adding unnecessary weight.
Tarp setup involves its own suspension system. You’ll string a ridgeline between two trees above where your hammock hangs, then attach your tarp to this ridgeline. The tarp then angles down on both sides, with guylines and stakes holding out the edges and corners to create your protected space.
Common tarp shapes include the hex tarp (six-sided), rectangular tarp, and asymmetric tarp. Hex tarps are popular because they provide good coverage while allowing versatility in how you pitch them. In good weather, you can set up an open configuration for maximum airflow and views. In storms, you can batten down the hatches into a more enclosed “winter mode” that blocks wind and rain from the sides.
Doors and beaks are features on some tarps that extend coverage at the ends, particularly at the head end where rain might otherwise blow in. While not essential, they add weather protection in harsh conditions.
The Structural Ridgeline: Your Consistent Setup
A structural ridgeline is a length of cord that runs inside your hammock from end to end, attached to the same points where your suspension connects. While not absolutely required, most experienced hammock campers consider it essential.
This ridgeline serves several purposes. It maintains a consistent hang and sag regardless of how far apart your trees are or how tight you pull your suspension. This means your hammock will feel the same every night, and you can achieve the perfect sleeping position reliably.
The structural ridgeline also provides attachment points for gear organization inside your hammock. Many hikers clip small items, headlamps, or gear loops to their ridgeline for easy nighttime access.
Insulation: Top Quilts and Underquilts
Here’s something that surprises many new hammock campers: sleeping bags don’t work well in hammocks. The compression of the insulation beneath your body eliminates its warming properties, leaving your back cold. This is where quilts come in.
Your underquilt is the most critical piece of your insulation system. This is a specialized quilt that hangs beneath your hammock, creating a layer of insulation that isn’t compressed by your weight. The underquilt traps warm air in the space between it and the bottom of your hammock, keeping your back, legs, and sides warm throughout the night.
Underquilts attach to your hammock using shock cord or clips at each corner, and most have an adjustable suspension system that lets you control how close or far the quilt hangs. Closer = warmer, which is what you want in cold weather. Looser = cooler, which helps in warm conditions.
Your top quilt (aka backpacking quilt) is essentially the top half of a sleeping bag without the bottom. It drapes over you like a blanket but has features like a footbox and neck cinch to seal in warmth. Since there’s no bottom to get compressed, top quilts are more efficient and lighter than traditional sleeping bags for hammock camping.
Together, your top quilt and underquilt create a complete insulation system. The temperature rating you need depends on the seasons you’ll be hiking. Three-season quilts (typically rated to 20 degrees Fahrenheit) are standard for thru-hikers on trails like the AT or PCT.
Quilt attachment is important for keeping your top quilt in place. Many quilts have pad attachment systems designed for ground sleeping, but you’ll want features like straps or clips that work with hammock camping. Some hikers simply tuck their quilt under themselves, while others prefer more secure attachment systems.
Additional Gear Considerations
Beyond the core components, a few other pieces of gear enhance your hammock camping experience:
Bug netting is essential for three-season camping. Many hammocks come with integrated bug nets that zip closed around you, creating a protected cocoon. Separate bug nets are also available if your hammock doesn’t include one.
Stakes and guylines are needed for your tarp setup, just like with a tent. You’ll typically need 4 to 8 stakes depending on your tarp configuration and how much adjustability you want.
Stuff sacks and organization help keep all your components together. Many hikers use a small stuff sack for their suspension system, another for their stakes and guylines, and larger sacks for their hammock, quilts, and tarp.
Making the Decision
Hammock camping isn’t for everyone. It requires trees (which can be scarce above treeline or in desert sections), takes practice to master, and involves more gear components than a simple tent. Some people never adjust to sleeping in a hammock, while others become instant converts.
The best way to know if hammock camping is right for your thru-hike is to try it before you commit. Borrow or rent a complete setup and spend several nights testing it in various conditions. Practice your setup until it becomes second nature, experiment with your sleeping position, and see how your body responds.
For many thru-hikers, especially on heavily forested trails, a gathered end hammock offers unmatched comfort and versatility. The ability to camp almost anywhere there are trees, combined with the comfort of sleeping suspended, makes hammocks a compelling choice for long-distance hiking.
Whether you choose a hammock or a tent, understanding your options helps you make an informed decision. Now you know what it takes to hammock camp successfully, and you’re equipped to explore whether this sleeping system is the right choice for your thru-hiking adventure.