This is our entirely free online backpacking resource aimed at helping you in preparing yourself for starting a long-distance thru-hike. The goal of this thru-hiking 101 guide is to help you become informed and be able to get the right knowledge and gear.
When you make the decision or are investigating the choice to take on a hike like any of the triple crown you are signing up for a long process and preparation, which typically will start a year before your hike begins.
Thru-Hiking Offers the Chance of a Lifetime
Let’s admit it, this hike will be more than likely the trip of a lifetime for most hikers. You will likely be putting everything else in your life on pause to complete this trip.
You need to treat it as such and put everything into this to ensure you can stay physically and mentally fit to ensure you are one of the 25% who ends up completing the trek.
What is Thru-Hiking?
While this question is frequently asked by many outside the community or people who have just heard of the idea, thru-hiking itself is pretty simple at its core, and I feel the best way to describe it is:
Thru-Hiking is the act of carrying everything one needs to get from the trailhead to the trail end, preferably in a continuous direction and movement.
However, longer thru-hiking trails can sometimes lead to needing to “flip flop” or change directions due to weather and other issues.
Thru-hiking is a semi-form of self-torture mixed with self-exploration, something that pushes you to your physical, along with mental, limits.
Many will never have been pushed this hard before deciding to start their long-distance hikes.
What is Considered a Thru-Hike?
When you are looking to build up from backpacking and hiking, this may leave you wondering what is the difference between these and what is considered a thru-hike.
At its core, a thru-hike is an end-to-end backpacking trip on a single trail from start to end. Most count only a single shot, but the longer trails this time is calculated within a calendar year. Most only see triple crown trails as a “thru-hike,” but this is far from the truth.
Don’t get me wrong, short thru-hikes like the 97 miles long Lone Star Hiking Trail are not as difficult as the AT and are typically a week-long thru-hike.
The feat is still the same and that you are a thru hiker at that point in time, in fact many would do better to begin small like this to be successful.
What About Thru Hiking is Different Than Backpacking?
For me, there aren’t a lot of groundbreaking big differences between the two as they are functionally the same thing. Much of it is more along the time that a thru-hike takes versus a typical backpacking trip.
In my eyes what I see as backpacking involves a trip from point A to point A typically with nights spent on the trip in between, this could be on an out-and-back trip or on a looped trail that ends and begins at the same place.
What you really want to know though there is how long you are able to be out there traveling 12-20 miles per day and what is the right fit for you currently in your life.
What is The Right Trail for You?
Here is where many will diverge as there is no “one” right trail for everyone, for example, to do the Appalachian Trail you will need to have saved $5,000+ and have the ability to take off 4-6 months from employment.
While this style and option may fit well with someone who has, for example, just graduated high school, college, or maybe retired, for most of us, this is a near impossibility.
This is why I feel that many should look at the other options for trails that exist in different lengths and times needed to complete them.
For these other trails, you may need only take 7 days to a couple of weeks, this is why I started with the Lone Star Hiking Trail.
There are a great many options though and these can give you some ideas as to where you can adapt your needs to your life.
| Trail Name | Location | Trail Length | Time to Complete |
|---|---|---|---|
| Lone Star Hiking Trail | Texas | 97 Miles | 5-7 Days |
| Ouachita Trail | Oklahoma | 223 Miles | 2-3 Weeks |
| Colorado Trail | Colorado | 500 Miles | 4-6 Weeks |
| Arizona Trail | Arizona | 800 Miles | 6-8 Weeks |
| Appalachian Trail | Multiple | 2190 Miles | 5+ Months |
| Pacific Crest Trail | Multiple | 2650 Miles | 5+ Months |
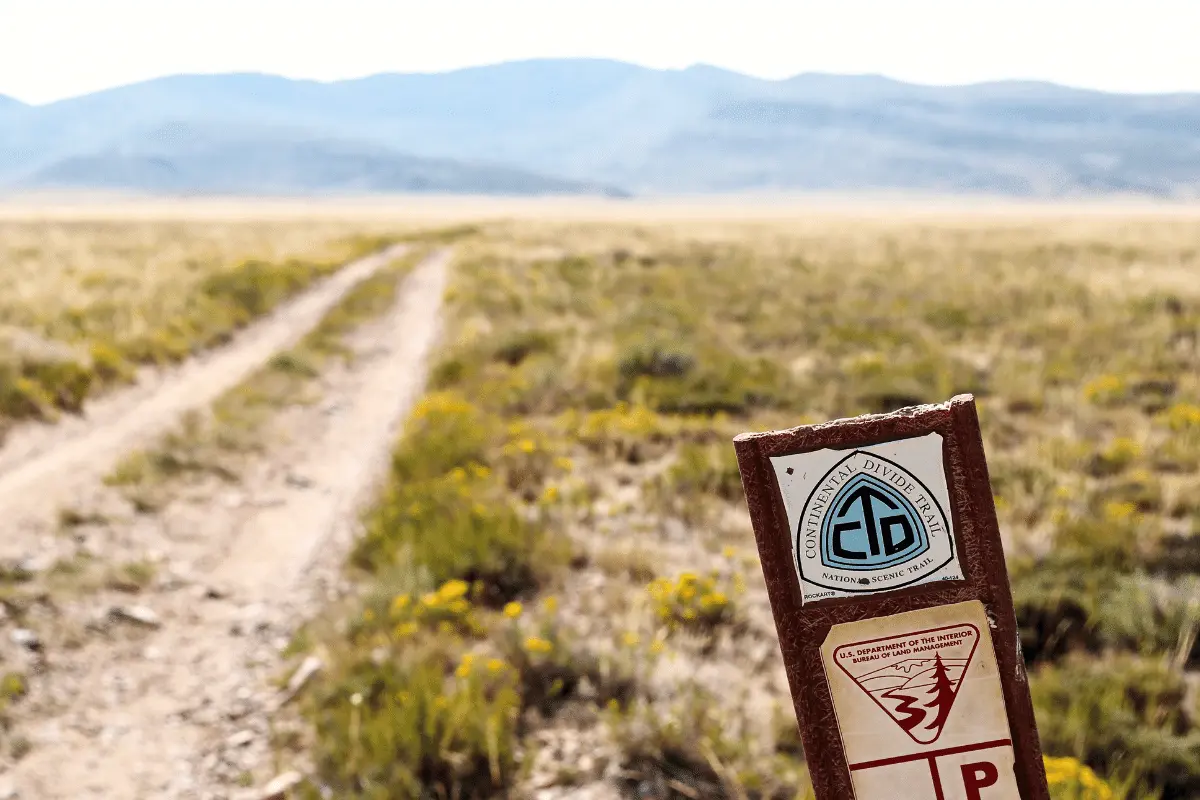
| Continental Divide Trail | Multiple | 3100 Miles | 5+ Months |
As you can see, there are options in a great many different lengths and timeframes, so if you can’t quit your job, you can locate a trail that would fit within your ability to take time to thru-hike instead.
This list is my wish list as the years move by to get myself mentally and physically prepared for the longer distance hikes, figure out my preferred foods, and how I choose to travel when I need to think about NERO and ZEROs.

Gathering Resources (Time and Money)
Now is where the rubber begins to hit the road, gathering resources will be the longest part for many with a plan beginning nearly a year in advance or more on the longer trails, like the AT, PCT, and CDT.
You will need to start saving money and if you plan to keep your job, you will want to be banking all the paid time off (PTO) that you can afford, for most getting a split savings account will help the money savings as you can divert a set amount per month without ever seeing it.
If you expect to spend $5000 on your trip, or about $1000 a month, you will need to have this ready before the start date of your thru-hike.
For myself, I want an additional 20% on top of that in case of issues or for when the hike is over to get life restarted again.
For time off you may be able to ask your boss if you can have a sabbatical or an unpaid leave of absence that would provide you employment as soon as you are back home.
This sabbatical time will always be preferable, but be upfront with them as to your timeline so they can properly prepare to be without you.
This may sound like you are protecting a company and may worry about them deciding to let you go before, but to me, this will depend on your job, your boss, and your quality of work overall.
Get Family Onboard
This step may be the easiest or the most difficult. Depending on your family they may either believe in you getting out and experiencing a life-changing event or they may be horrifically worried about your safety and worry.
These can lead to being a tremendous draw on your energy and willpower to actually begin, adding pressure to you and your work to get prepared.
Take the time to set them at ease, show them some YouTubers like Dixie and Darwin, and that it is a time for you to grow.
Tell them you will have laid out plans of your intentions and that you will not be isolated from the world for the trip if possible invest in an InReach Mini or similar tracking GPS where they could see your location through a cool hidden page that you give them to log in on.
Understanding Your Why
The most centered idea to your decision to thru-hike, your personal why is going to be your guiding light when it all goes wrong. Are you doing this to see what your limits are, a challenge (mental or physical), or something else altogether?
I would suggest thinking about this part real deeply, this will be what you think about when the weather is incredibly cold, or it’s raining, and you are beyond soaked through and are honestly thinking about quitting the trail.
This comes from your heart and from your mind, a good way to think about it is to build a list in a notebook or journal and add the good reasons and any negatives so you can start to get yourself prepared for them both.
Fortune Favors the Prepared
For you to be successful you will need to be properly prepared for this journey, it isn’t something you should take lightly if you want a more guaranteed shot at successfully finishing.
You are going to need to plan, revise the plan, and plan again. Then note that with all good plans after day one you will toss them all in the trash as you will have to adapt but the knowledge gained while planning will be invaluable.
Plan, Plan, Plan
As an initial plan of action, you should begin to read everything you can on the trail you are choosing to thru-hike. You want to know as much as you can to be able to make decisions and alter plans on the fly while hiking out on the trail.
You want to have an idea of how long you will need to complete any specific sections on the trail as you should always pass on a general plan to friends or family as to where you expect to be.
These plans should include an initial understanding of the weather you will more than likely encounter, the gear you are thinking will work well, and then you want to work on refining this information.

Build Up Physical Fitness
In addition to your overall planning you need to have a plan to amp up your physical training as you will be taxing your body in ways it has never been tested, so how do I get in shape for a thru-hike?
You want to make sure that you are decently up to the task to get a better chance to succeed at your goal of completing your thru-hike, if you are lacking physically it can have a direct impact.
Many people work out in the gym and focus on their upper bodies as it is the “glory” muscles, the vanity side helps get people working out but this is DEAD wrong for hiking.
Hiking is going to work your lower body in a vast array of ways, from lifting you up over obstructions to all the stabilizers adjusting for uneven terrain which can lead to body fatigue.
I would suggest you look at adapting your training regimen at least to increase the volume of stair climber work as you have plenty of PUDs on many trails along with actual on-trail hiking.
It can’t be understated that the BEST TRAINING FOR HIKING is hiking, hands down, you on the trail carrying a backpack and putting in miles on the hard ground will tell you more about your readiness than much else can.
Build Your Budget and Finances
The next key will be to focus on building up your finances which will require building a budget and knowing your current expenses versus what you can begin stripping away to save money.
Since you know the range of money you will need for your time on the trail from your planning above, you will now need to look at reaching this amount of money.
Break it down into every paycheck from now until you are planning to head out and see how much per paycheck you have to put away.
If this number is more than you can actually afford to put away you have three options, change your start date, change your trail, or you can choose to add another part-time job.
You must know that you can make this before you start on the trail as you won’t have a way for dedicated income unless you have built an income source before or another passive income source like stocks.
Many people will have hosted their videos on their YouTube channel, here is a good course that can teach you those skills, which may help add a supplemental income but shouldn’t be relied on as your primary funding method.
Figure Out Your Housing
The last thing in this list is nearly as important, whether you own a home or rent someplace, you are going to need to figure out how to get out of the lease or manage the lease to end on your terms.
If you own a house, you need to think hard about whether you need to sell and be clear, or if you plan to try and rent it out you need to find a property management team you trust to manage it on your behalf and make decisions on your behalf.
If you plan to rent or have a family stay there it will impact your budget as you will now need to have more money to possibly pay all the standard housing bills like a mortgage, power, water, heating, and more.

Planning and Learning Your Trail
Now that you know which trail you are going to hike you want to double down on learning every in and out you can along the trail.
Preferably you would be interested in knowing where the typical water sources are and where your campsites are located, this gives you the two main factors you need to know.
Why Planning is Helpful
In planning, you are working out all the miscellaneous details that are very important to know and to ensure you don’t miss something vital to your successful hike.
Overall planning will lock you into your start time and the drop-dead date you have to finish by, allowing you to find out which permits you need and if they have to be carried on paper or on your phone.
This time also is where you figure out the plan to even get to the trail, can you fly, or are you driving, a train, who knows! This will need to get you to the area to start and typically you will need a plan to get from the airport, for example, to the trailhead.
Planning should also include some basics to survival to make sure nothing goes wrong, but that if it should occur, you know how to handle yourself and get out of it without issue.
Navigation and knowing how to use a map and compass is something that can’t be skipped, yes I know we have cell phones and this is the wireless generation, but the map will never lead you astray.
Lastly, after this is all complete you need to have that confirmation talk with the family about the trip, you need to give them some quality documentation.
This will be for them to have an idea of where you are and at what times in case you shouldn’t check in they have an area to search.
Figure Out if Permits are Needed or Required
There are many permits required on many of the long-distance hiking trails that you must have with you or be able to print before you head into the area, this means making sure you identify these prior.
Once you find these, then you need to more than likely ask for the permit long before you are on your hike, this is why planning will help you out as you should have a vague notion of the time you believe you will reach the area.
Some permits you can keep on your phone, many though are printed only so you will want to think about printing them prior to leaving and keeping them dry and safe, or you want to look at the towns prior to the area and find someplace to print then.
Other places like Baxter Park when hiking the Appalachian Trail fill up with reservations fast so you need to request them long in advance of when you know that you will reach the park, again this will all come down to taking the time to plan out.
Set Your Start Date
Now that you are planning out and have your basic knowledge set and you have worked out your finances you are set to lock in a start date.
This will work for many trails but for some, you have to enter into the lottery and will be told your start date, like on a PCT thru-hike.
Another one similar to this is the Wonderland Trail in Washington that goes around the base of Mt Rainier, sometimes you won’t have a locked-in start date until you go through this other process and find what time you will be given.
Know Your Stop Date
This may depend on you or on the trail itself, your stop date can be October, and heavy snow on Baxter makes it impossible to finish, it could be that you are reaching the end of the time off you had and you have to get back.
Understanding this will help you keep moving ahead and help make sure you don’t get too lazy with extra NERO and ZEROs in town, they can get addicted to getting food and drink without almost zero effort.
How To Get To and Then From the Trail
When you arrive in the state, you plan to begin your hike what is the plan to get to the actual trailhead?
Many may choose to hitch out but then how do you plan to get back to the start point after you complete your thru-hike?
Many of these questions you will want to lock down before you begin your travel. Some places have Uber or Lyft, many won’t and you may need a shuttle or cab at a great expense to get to the actual trailhead, know your plan prior!
The same thing will happen once you reach the end of the trail, once done do you have a plan or a contact to get back to where you need to and if not, why not?
This is something you want to have aligned prior to ensure you aren’t stuck out away from the world.
Learn Navigation Principles
To start on any trail, you should have some understanding of the basics of navigation, these help to keep you safe when everything goes wrong. REI offers some awesome navigation classes for those who want to be covered.
I wish I was far more versed, but I know how to orient to a compass with a map and how to get from one point to another on a topographical map with land heights to ensure the best way to move.
For a beginner and to get a grasp I suggest the REI Introduction to Maps and Compass Navigation.
For ladies who want to be in a class with just women, they also offer a specific Women’s Introduction to Map and Compass Navigation.
Plan the Itinerary and Share It With Family and Friends
Not it is time for the responsible part of making sure you have a solid itinerary that you can provide to friends and family, this isn’t just to showboat your trip but to protect you in case of emergency.
This book is to tell them where you plan to be and when, and while we know this will change when you are out on the trail, this gives them the means to help find you should you disappear without a word.
This also comes back to having a GPS device, like the Garmin InReach Mini or a similar device, where you can provide friends and family a URL to see your progress.
It is a backup plan as they can reach out should this not move as expected and help searchers pinpoint you.

Food and Resupplies
Now we will dive into a topic that everyone loves, food, and how you can look to prepare and manage your nutrition on the trail.
Unfortunately, many choose to just “wing it” as to their foods, eating whatever something has that looks good but this can come at a cost over time.
You definitely need to manage your caloric intake based on your use of calories and your current body fat levels, but in addition to this, there are other nutrients and minerals that help you function at your peak.
After these topics we will move into how you are going to get your food, using mail drops or grocery stores will be important as to your costs but also because you may find something you boxed not interesting after months.
Food on Your Thru-Hike
For your hike, the food will obviously need to be shelf-stable and able to last without refrigeration most standard foods wouldn’t last.
This for many means a solid diet of candy bars, beef jerky, peanut butter, and other less-than-ideal foods that have some issues with actual nutrient density.
In this case, what you need to understand is that you are going to be using much of your stored nutrients which is why as time goes many hikers start to experience physical ailments.
Focusing on calorie needs must be a priority, especially for people with low overall body fat levels to start with, but it can’t be your ONLY priority or you may end up with numerous other issues to recover from that can be longer lasting.
Manage Caloric Density
A key to long-term success is managing to eat enough food as you will be burning on average about 4,000 calories a day on a long-distance hike. This can really dent your stored energy if you run at a deficit too long.
For 1 pound of body fat, you have approximately 3000 calories of energy, so if you are lean before you start, you will have to eat some serious volumes of food to ensure you don’t bonk and quit.
If you are overweight the trail may be your best friend to quality body fat loss while helping build muscle mass, muscle mass will help you continue to burn off fat even while off the trail.
For most hikers, the food prep for days worth of hiking will be between 1.5-2 pounds per day, if you want to make sure the protein is kept around at least 1g per pound of lean body mass you have to ensure a well-maintained body.
As to the most energy in a low weight you would be hard-pressed to beat fats, they come in at 9 calories per gram whereas carbohydrates and protein come in at 4 calories per gram.
To Resupply of Not
There are people who fall on either side of the line, to send resupply packages or to forgo sending them and live off the stores along the way.
While I can see the reason to skip having to manage and deal with pre-boxing food and items you may need it can help you get precious nutrition on the trail as 7-11 and dollar trees aren’t high on quality foods.
I would say to at least plan a box every two weeks that can contain some quality nutrient-filled foods, you can even look to include electrolyte or mineral supplements to help you.
Mail Drops
Having resupply boxes sent means organizing your trips with stops to go into specific towns to gain access to the mail where it will be dropped off, with technology now you also can look to Amazon lockers in town also.
This can bring in unplanned downtime as you may reach the town at night after the mail service has shut down for the day and won’t open until the next day, sometimes this could be all the way until Monday.
Just be aware of this and you can accurately plan around where you know you will want to stop or provide whoever will do the mail drops on your behalf so they can replace them if you have a change in schedule.
Bounce Boxes
This is the process of taking a box that is at the USPS and instead of opening it if you don’t need anything inside it that is, “bouncing” it forward to the next planned stop at a city with a USPS.
As long as you don’t open these boxes, you can continue to bounce a package forward as long as needed. This can be helpful if you find you have used fewer resources than you expected.
Grocery Store Resupply
The other method opposite of using resupply boxes is the grocery store resupply method which is more focused on living in the moment and only using the stores you come across.
This method will be more adaptable and change as your tastes change on your thru-hike but at the same time will tend to cost you much more money than buying the same goods at home due to mom-and-pop shops and scarcity.
This is also the way that will get you a very nutrient-lacking diet that can cause you all kinds of health issues the longer you are on the trail, take care to not just focus solely on junk foods to manage your diet right.

Gearing Up – What to Bring on a Thru-Hike
Now comes the fun part that most people look forward to before a long hike, building up the gear that will make you ready to start on the trail.
You do have a lot of things you will be able to choose now that you have done all the steps above, understanding the trail and timeframe you will hike will help influence which gear you are going to purchase.
Then we can examine what you can do to drop pounds on your back by lightening up key gear that will ensure you have the lightest carry you can afford.
What You Need for a Thru-Hike
There is a load of overall gear needed for a thru-hike, the basics we will outline below along with a top performer and a more budget-focused version to help you see differences.
This list is aimed at being ultralight and managing a sub-10-pound base weight which will be my end goal as it allows for less strain on my body, so more miles with less wear and tear!
Hopefully, this has shown you there can be a vast difference in gear depending on your budget availability.
For many a “budget” set of gear for a thru-hike will need to be at least $1000, and many people will range up to $3000+.
This list will help you understand the vast amount of gear you will need but there are a few key decisions on your gear you will want to make that will set the line for the rest of your gear.
Key Gear Decisions
Now is when you will need to make your key decisions which will influence the rest of your gear.
First, up will be the shelter you want to sleep in.
Shelter Options:
Each of the above will influence other gear decisions, for example, if you decide you want to hammock camp then you need to get a very different gear.
A hammock set will need to get an underquilt, top quilt, tarp to keep dry, and then a method to suspend your backpack off the ground along with all the cordage.
For a tent and tarp, you will typically want at a minimum a sleeping pad and a good low-temperature sleeping bag or quilt, if unsure which is right for you I have a solid list of amazing sleep gear here.
The choice of shelter will influence everything else you purchase as you may need to get a larger backpack, you want to understand and lock in your shelter to then move on to the rest of your gear.
Gear and Pack Perfection Through Shakedown Hikes
As you acquire the gear, you really need to put it through the paces to ensure you know how to use it with ease and that there are no complications or difficulties.
This practice time in a shakedown will help you be better prepared for when you get on the trail as you start your main attempt at a thru-hike, don’t find gear failures on the trail!
Another thing shakedowns help you find out about yourself and your gear, many times the gear may be perfect but it may not be for you, while this may sound silly it is the truth.
Sometimes gear is high quality and works for many others but fails to do what you need it to do for you.
Each time you do a shakedown, you should remove something from your gear that you didn’t use, with the exception of safety-based gear like first aid kits, and then on the next shakedown you continue until your pack is perfect for you.
Shakedowns also show you in your gear where you may lack, for example, on the Appalachian Trail, having quick access pockets for gear swaps can be helpful.
Nothing like having to learn the hard way by digging into your pack for raingear 10 times a day to grab it and put it away once the shower ends.
Tips to Lighten Your Pack Weight
Below I have some core simple ways to lighten your pack and free you up to possibly get lighter on your feet and save you from sore back and knees.
Get a Scale
Honestly, this is first on the list as you want to move away from generic online listed weights, no matter your gear it will never match that listing 100%, and instead, make sure you know YOUR gear’s weight.
Work Towards Getting Your Big Three Ultralight
- Sleeping Bag – 18 oz or less in most cases, but also note that a warmer sleeping bag will contain more insulation and will weigh more
- Backpack – 30 oz or less for a 50-liter backpack
- Shelter / Tent – 2 lbs or less for a solo tent, 1 lb or less for a tarp
Choose Down Over Synthetic
Down gear will cost more but will typically drop significant weight when used to insulate gear, in addition down can collapse far more and take up less space allowing for smaller backpacks and dropping pounds from gear and pack.
Repackage Food and Personal Care Items
Take everything from the original packaging as this will ensure you drop much of the packaging weight and keep more than just the food weight.
For most, they will organize food into daily food into individual 1-gallon storage bags to make sure you aren’t undereating on any one day.
Sleep System: Maximize Through High Power Down Insulation
To drop pounds on your gear, you want to get the highest FP, or Fill Power, down you can get. This means there are fewer down feathers needed to get the same level of warmth which helps drop serious ounces to pounds.
The highest level of fill you can find today is 950, and this tends to be much lighter due to the ability to fill more space with less overall down.
Example: 1 ounce of 850fp down will fill 850 cubic inches, whereas 1 ounce of 950fp can fill 950 cubic inches. Over time this 100 cubic inches adds up!
Choose a Trekking Pole Tent
Gone are the days of carrying tent poles for your tent. Instead of cutting weight, you will want to invest in a trekking pole tent.
This will cut the weight of the poles directly off your base weight and make dual use of the trekking poles you will be bringing on your hike, something I am always keen to do is get multiple uses out of gear.
There are versions of trekking pole tents that require only a single pole and others that require two trekking poles, the single poles tend to be 1P tents, and dual poles tend to be 2+ Person tents.
Limit Your Wardrobe
You are going to be hiking and you are going to stink. You won’t want to be carrying more than 1-2 duplicate pieces of clothing at all as it will just be dead weight on your back.
What you need to focus on is choosing the best gear to take the abuse, removing synthetics, choosing merino wool clothing for better odor protection, and for most treks you need to avoid cotton in general.
Many will bring two sets of clothes, one that is hiked in constantly and another to switch into for bed to be out of the dirty and grimy clothes for a few hours.
Remove Batteries When Possible
Since nearly everyone who is on a thru-hike has a cell phone now almost all will bring a battery backup to charge it while they are out on the trail.
Due to this change, it is better to purchase gear that can be charged via a USB cable and battery backup and cut the extra weight of installed batteries and emergency batteries from your pack.
Never Pack Books
Many people believe that when they are out on the trail they will have all this time to read and enjoy a good book. Please don’t do that to yourself!
Instead, make sure you bring good quality, lightweight map of the area to navigate in case of issues and limit miscellaneous books to save pounds.
Go Stoveless and Cold Soak
Choosing to drop the stove, fuel, and lighter can help you drop a good chunk of weight quickly while still providing you with a good variety of foods.
Cold soaking provides some awesome and easy recipes that you can start 30-60 minutes before getting towards the camp to allow you to cover more distance and eat faster.
I have some amazingly tasty ramen recipes here.
Learn Your Food Needs
This one is tricky and will come with more time out on the trail hiking. Most will start at the often repeated 2 lbs per day, I have seen people run lighter and some run heavier but each person varies so work this out.
Dropping from 2 lbs a day to 1.5 lbs per day would mean a drop of nearly 3 lbs of food over a 6-day trip, I won’t preferably drop food but it is also one of the things most frequently overpacked.
Learn to Camel Up
What happens when hikers come across the water is they think to fill all their bottles for use until the next water source, sometimes the next one is a long distance away, other times not.
What you need to learn to do is to fill your bottles but also take this time to “camel up” and drink a large amount of water in addition while at the water source so that you will start into your stores much later.
Interesting fact is that 16oz of water weighs 1 lb so when you carry 2 16 ounce bottles that equals out to approximately 2 lbs on your back, hips, and legs!
Sometimes this can be used to carry less water between water sources or can be used to ensure you have plenty in case anything should happen before you reach the next water source.
Ration Water Carrying
Working in semi-partnership with the above rule on making sure to camel up, this one is more about learning how much water you need to cover a distance between water sources.
This will help you carry less weight in pure water on your back that you won’t need. This is something many people will do out of fear as water is so vital.
This is why this is a skill you will build over time while you learn to evaluate the trail ahead.
Swap out Hard Bottles with Plastic Bottles
Many people remember seeing those avid hikers of yesteryear carrying the big bulky Nalgene bottles, which are rugged but come with a significant heft and weight without any water.
Instead, most hikers have adapted to the Smartwater bottles since they easily align with a Sawyer Squeeze water filter without any significant effort or extra parts.
There is cause for an argument for a Nalgene. Should you be in a place with cold temperatures at night, you could fill a Nalgene bottle with hot water and bring it to bed with you where you can’t do that with a plastic bottle.
Consider Trail Runners Over Hiking Boots
Long-held a belief by non-hikers from movies and history is that everyone who hikes long distances does so in big heavy hiking boots.
While this was the favorite of all hikers, as backpack weight lowered, more options began.
What is far more comfortable and built for the long run are the new trail runners. These are super lightweight shoes that can take the abuse of the trail for upwards of 500 miles if you aren’t a toe dragger.
They have very solid tread meant to help grab and grip the trail, which means fewer slipping issues, and being more like a common shoe allows you not to have to change your gait to walk in them as hiking boots.
Eat From Your CookPot
Consider skipping on the extra collapsible coffee cup or bowl. While this may sound like a good idea, it adds weight that isn’t necessary as you could eat and drink from your cook pot and save yourself an additional single-use gear.
Leave Nonessentials at Home
You have many non-essentials that you will bring with you to get yourself to the trail, but you should aim to minimize them as much as possible.
Instead of carrying your entire wallet, for example, you want to carry your driver’s license, 2 credit cards (1 primary pay, 1 as backup), and then a small zip lock back to manage to carry the cash and change as places along the trail may have limited card access.
Outside of that example, look at what you have and make sure you aren’t packing something that will have no use for you while out on the trail so that you aren’t carrying them as dead weight.
Post Trip Process to Ditch Unused Gear
This needs to be done each time you complete any hike with your gear. Afterward, you should deeply look at each gear and look to remove anything you didn’t use.
Ditching gear will not give you huge pounds of lost base weight, but it will help you nickel and dime your backpack into a much nicer weight of only the core gear you need to survive a trip.
Limit Yourself to a Single Luxury Item
For many thru-hikers, you won’t want to carry a lot of luxuries, but when you are thinking about a few to help the trip be more enjoyable, you should weigh them against each other for value.
For example, I know someone who always carries a Helinox Chair Zero. It is less than or right around a pound of weight but to him, it is worth it.
He never needs to find a place to be able to sit and relax and eat some food, and it is always attached to his back for instant access.
For others, it may be something as simple as an inflatable pillow. I am still arguing this point for myself as I have tried without and using a jacket as a pillow wasn’t super comfortable, so I am on the ledge.
Best Options To Spend Money On
The core of your money should be focused on your Big Three Gear: Pack, Shelter, and Sleep System.
These generate the biggest bang for their buck and will give you the best performance for the amount you will spend, especially if weight is a factor.
Why Focus on Your Backpack?
Your backpack is your home, office, lounge, and closet while you are out on your thru-hike. It will be the thing that you need to count on through rain, snow, and sunshine to carry your stuff from campsite to campsite.
This is also a gear that can become quite heavy. If you look to find low-cost options, you will find they may sometimes double the weight to cost you $100 less!
Make sure you don’t purchase your backpack until you have found your shelter and sleep system to ensure you get the right amount of space within your backpack.
High-Quality Backpack Options
- Hyperlight Mountain Gear 2400 Southwest – A favorite of many thru-hikers and a consistently good-performing backpack that withstands the torture that comes on a 6+ month trail hike.
- Zpacks 64L Arc Haul – Made from Dyneema, this pack is ultralight-weight but durable. It also allows quick access to your bear bag or camera gear with a zippered front-loading panel.
- Osprey Atmos AG 65 Pack – Don’t abandon comfort on the trail. The Osprey Atmos AG 65 pack uses Anti-Gravity™ technology to distribute the load and provide a dream-like fit.
- Granite Gear Crown2 60 Pack – A much more price-friendly backpack with all the features of a long-distance hiking backpack.
- Shadowlight Ultralight Backpack – This backpack from Outdoor Vitals is incredibly lightweight while being full of function and is my current backpack as of 2021.
Why Focus on Your Shelter?
Your shelter will be your real home for the foreseeable future, the place where you try to rest and unwind from the long days of work or hiking and where you bunker down in heavy rain, snow, or other inclement weather.
This is why choosing carefully will help you in your thru-hiking experience. You need the right fit that won’t feel claustrophobic over six months of living inside it.
For some being in a hammock lifted off the ground is their ideal place to relax after a long day hiking, but this can make it hard to sit and take stock of all your gear.
Conversely, a tent will give you lots of space but at the cost of more focused preparation in placement as you need to think about water and staying out of low points in heavy rain.
High-Quality Shelter Options:
- Zpacks Duplex – I couldn’t list any tent above this one as this is a tried and true awesome Dyneema tent, but it is a budget buster at nearly $600.
- Dan Durston X-Mid – An excellent all-around tent made from sil-poly so that it won’t sag as it gets wet and requires minimal stakes to set up in a hurry, like when it is raining…
- NEMO Hornet 2 Tent – This is a solid and loved tent that isn’t a trekking pole tent and has shown it can easily survive thru-hikes without issue.
- Hammock Gear Bug Net Hammock – 11 ft Hammock with Zippered Bug Net features a symmetrical gathered-end design that allows you to lay in any direction comfortably.
Why Focus on Your Sleep System?
Many will incorrectly think that their tent provides them warmth. This isn’t true. It can provide shelter from environments but heat comes from the sleeping system itself, and your choices will have a direct impact on this.
Your sleep system will depend on whether you choose a hammock or a ground-based sleep system like a tent or tarp. Hammocks are very detailed out, and I will just be detailing sleeping bags, quilts, and pads as most are tent hikers.
R-Value needs to be focused if you are hiking in the early spring, late fall, or in snow and cold conditions. R-Value is the insulating value of your pad against the ground, a higher score means that it keeps more heat.
This is a key to a good sleep system as you lose much of your heat to the ground and less to the air. You then choose a sleeping bag or quilt to give insulation and help keep in the heat you make.
As for your sleeping bag or quilt, you are looking for at least a 20-degree bag, but if you sleep cold, you may want to drop this by 10 or even 20 degrees as nothing stops a hiker faster than no sleep and cold nights or at least look into a sleeping bag liner to add heat.
In recent times sleeping quilts have begun to take over from sleeping bags due to serious weight savings while managing the same overall warmth containment.
A quilt is much more like a sleeping bag with the back cut out and flayed open.
High-Quality Sleep System Options:
Sleeping Bags
- Sea to Summit Spark SpII – Designed to keep you as warm as possible while minimizing packed weight and size, the Sea to Summit Spark SpII 28 sleeping bag is ultralight and technical for your industrious adventures.
- Big Agnes Torchlight 20 Sleeping Bag – Serving up plenty of room without sacrificing coziness, this bag features an expandable panel that adds up to 10 in. of space to help you rest well in the wild.
- Therm-a-Rest Questar 20 Sleeping Bag – Dialed in for backpacking adventures, this fully-featured sleeping bag delivers 3-season comfort with 650-fill-power Nikwax Hydrophobic Down™ and plenty of cozy features.
Sleeping Quilts
- Enlightened Equipment Revelation – The quilt that has become the quilt for people thru-hiking and a huge favorite of many YouTubers due to the high-quality construction and overfills helping ensure you are always warm.
- Therm-a-Rest Corus 20 Quilt – Save weight and boost comfort when you venture into the backcountry with this high-performance backpacking quilt.
- Economy Burrow – This is a serious piece of gear regardless of the term “economy” being in the name. This quilt is perfect for those just getting started and who want a good down quilt but at a lighter cost due to only being in 850FP down.
Sleeping Pads
- Thermarest Uberlite – One of if not THE lightest pad available online but limited in cold weather due to its lower 2.0 R-value makes this mattress a great summer option.
- Therm-a-Rest NeoAir XLite Sleeping Pad – An all-around excellent sleeping pad that has an R-Value of 5.2, making it perfect for 3-season hiking use.
- Nemo Tensor – Offering quieter, more supportive sleep at a tiny packed size, the Tensor ultralight sleeping pad stands apart and is rated to 10-20 degrees for comfort.
- Klymit Insulated Static V – A all-around good performer for those on a more managed budget, coming in at an R-Value of 4. 4 is perfect for those who can’t explode the budget.
Typical Packs for Long-Distance Trail
This will vary depending on your overall gear, the size of your gear, and the weight of your gear. For many, there is no need for a backpack greater than 60 liters as this leaves room for all gear plus a little wiggle room for the luxury item(s).
If you can keep your base weight under 10 pounds, then you can probably almost fit everything you have in a 30-40L bag with ease and could use a pack like the Waymark Evlv or Zpacks Nero.
If you aren’t that low in overall base weight, then you will need to scale up as needed, below, I have listed out packs that are frequently seen on the Triple Crown trails by thru-hikers.
Typical Trail Backpacks
- HMG 2400 or 3400 Windrider – The 2400 Windrider is the pack that super-efficient thru-hikers and backpackers graduate down to when their kits are dialed, and the calories and fuel they need the way are never too hard to find.
- HMG 2400 or 3400 Southwest – When the route is thick with vegetation, the Southwest is the backpack you want up close and personal. This pack family is made specifically for tough adventures that would rip most other ultralight-style packs to shreds.
- Zpacks Arc Blast – Designed to hike along mountain trails, scale steep ascents, and weather those Appalachian rainstorms, the ultralight Arc Blast is perfectly suited for the demands of long-distance hiking.
- Osprey Levity 60 (Amazon) – With a lofty main compartment to host up to 60-liters or thirty pounds of gear, you can pack in all of your essentials for an ultra-light weekend getaway, and escape to the trails less traveled. Its main body is crafted from a lightweight Cordura Silnylon ripstop that holds up to branches on a messy trail.
- Granite Gear Crown2 (Amazon) – An ultralight yet ultra-comfortable multi-day pack. This new and improved successor to the classic Crown V.C. 60, boasts Granite Gear’s patent-pending fully adjustable Re-Fit hip belt, Granite Gear’s new and innovative Air-Current Mark 2 compression molded PP frame.
- Atom Packs Atom+ – Trails are changeable. If you go on a long thru-hike then your gear, clothing, food, and water requirements will all change as the trail goes on. The Atom+ is the answer – an ultralight pack that can adapt with you to meet the conditions.
- ULA Equipment CDT – The CDT is their lightest, most basic backpack. With just over 50 liters of available space, the CDT is the largest of three frameless packs the team at ULA makes and is suitable for thru-hikes, day hikes, travel, and any distance back-country forays.
Life on the Trail
Now the fun part, you finally get out on the trail and are living day to day along your chosen trail and sometimes in a trail town. Once you start on this road you have made the commitment to yourself to fight through the bumps, bruises, and scrapes and make it to the end.
What Is It Like Out on the Trail?
You want to know what it will be like when you are out on the trail, well we can dive into some of the overall issues you will run into and help you get in the right headspace.
You will want to manage your mileage on your first couple of weeks on the trail, especially if you aren’t super physically capable if is easy to overwhelm your body and cause issues for you long term.
Surviving the Mental Game
Probably harder in all aspects than the physical side is the mental game and pure challenge it will be to take on a long-distance trail when the grind begins to take away the pleasure.
What will probably be hardest is for most is that this will be the longest away from friends and family in your life, and while many of us say that we would love to be away we honestly, deep down, don’t truly mean it.
Many will end their thru-hike, not due to physical ailments, but instead due to the mental stress and becoming exhausted.
Incoming Aches and Pains
Unlike the videos and stories you will probably wake up achy much of the time, especially in the early going until your body has started to build itself up for the abuse you are putting on it daily, sometimes called the hiker hobble as your body adjusts to the workloads.
You will learn the true magic behind vitamin I to keep yourself moving when everything in your body and mind is yelling at you to “start slow” and to “take another day in town”.
This is why I am a huge fan of a thicker sleeping pad, getting that little bit of extra height from the ground allowing me to lay on my side is worth the little extra in expenditure, smaller isn’t always better, especially as you get older.
Getting Used to the Stink
Many hikers, will have never smelled a human without numerous body odor-hiding inventions we created to help us share tight, enclosed spaces.
The first thing you may find is that your clothes after even a day or two begin to smell incredibly pungent, like super bad, and not in a good movie kind of way.
As you go you will actually start to become nose-blind to the smell, your body does this by default when something is not “out of the normal” anymore, but this DOESN’T mean that others don’t totally smell you.
Refocused Senses
Amazingly, when you totally change your environment and remove all the “busy life” sounds that typically overwork and exhaust our senses, you will start to become far more keenly aware of things around you.
Enhanced ability to smell, so many thru-hikers will say that they are able to smell the day hikers and their deodorants and perfumes far before they see the person. Many have said up to 1/2 a mile or more away!
Your hearing will also become much more attuned since there is no need to filter out the hustle and noise a city pollutes the world around you with your ears finally will become more aware.
Management of Your Boredom
The one thing that will strike you if you hike alone a lot will be boredom, and you will find that you will actively search out people just to start communicating with them as there are only so many audiobooks someone can listen to in a day or week.
While on the trail you will see some amazing stuff but there will also be sections of the pure green tunnel with less vast and amazing views and more tree-lined paths on either side.
Daily Routines
You will find that you move into a fairly repeatable daily routine while out on the trail as most people will have a time that they will nearly wake up without fail, some before dawn and others after.
Then the general process of packing up and leaving begins. You will change clothes into what you are hiking in if you changed out of those clothes. Start to fill water to make coffee, and breakfast, or like me pack my pack and get my tent all to put away.
Typically in this morning ritual, most will find a privy or find a spot out away from the campsite and trail to do their morning business. Then, it will be time to check the mileage for the day and set out.
Normally it can be cool to cold in the morning on many trails so you start in your warmer gear and as the day warms, you begin to drop layers to maintain the perfect temperature and if possible avoid hard sweat.
For many, they will plan stops around places they want to see since this will bring on time used to get out cook kits and heat water sometimes this can also be where the Tramily decided to catch up to one another.
Once you are at your designated endpoint for the day you will want to go find your spot to set up, tent and hammock will vary depending on the trail and camp spots.
Many will change clothes at this point to get out of cold and possibly sweaty clothing before the temperatures drop at the end of the night and then you will go get more water and cook dinner.
You will do this, or a similar process daily for up to 6 months while you complete your thru-hike. It can be monotonous but remember that you are experiencing life and sometimes it can be grueling!
Trail Etiquette for Hikers
Knowing and following trail etiquette is a must for anyone going out for long hikes on the trail. These are to help both parties know how to react and treat each other.
Always Yield to Uphill Hikers
This shouldn’t be surprising, but when you are traveling downhill, you need to yield the right of way on the trail to hikers on their way uphill. As you may expect, this is mostly due to the work required to start and continue moving up a hill.
In addition, when you are traveling downhill, you tend to have a broader view of everything in front of you whereas a hiker coming uphill will have a narrow field of view and will be focusing hard on the next step.
Move For Big Groups
For most huge groups on the trail, it is good to move out of their way to allow the group to stick together, most of these groups should drop down to a single file and it should make for smooth movement and you get on the way faster.
Being Friendly to Fellow Hikers
It can benefit you greatly to be friendly with others on the trail, especially if they are heading the opposite way as you, they may be able to provide you invaluable feedback on the trail conditions ahead and grant you a heads up.
Make sure to do the same when you get information to try your best to provide something back that can be of good value to them also, each is on a trip, and the information is super helpful.
Hike Quietly
Don’t be that person who blares music and sounds out loud into the environment, we all have encountered that person who may be tired of wearing headphones but this disturbs everyone, hikers and nature equally.
This doesn’t mean you need to be quiet as a dormouse but that you shouldn’t detract from others’ experiences in the great outdoors.
Leave No Trace
One of the biggest things for all hikers to know and understand, you need to focus and practice strong LNT principles, which is to Leave No Trace.
This encompasses many different factors, obviously restroom and digging proper cat holes, packing out what you bring in, and staying on the trail.
When you got to go, you got to go, the saying goes. While this is true you must make sure to do your proper diligence prior. According to Leave No Trace, the best practice is to go at least 200 feet away from any trail, campsite, or water source to do your business.
One of the huge things that have gotten bad in 2020 and now into 2021 is that hikers are coming out in droves, especially many new ones, but they are dropping wrappers and trash all over and not carrying it out.
Staying on the trail is vital to ensure the trail looks the same to you as to the next hiker, this means attempting to disturb as little as possible and making sure not to knock over things like Rock Cairns.
Trail Safety Basics
Create an itinerary
You want to have a detailed plan that you have provided to family or friends, this way there are people who know where and when you are supposed to be, along with someone to notify help should you go missing and possibly save your life.
Prepare For Weather
Always evaluate and prepare your gear for any of a range of expected weather possibilities, this ensures that if the worse weather moves in you have something ready to help you either mitigate it or to help ride it out.
Pack the 10 Essentials
The objective of the 10 Essentials is to ensure that you can respond to an emergency and spend at least one night outdoors.
Here’s NPS’s expanded version of the 10 Essentials:
- First aid kit
- Navigation: map, compass, and GPS
- Sun protection: sunscreen, sunglasses, hat
- Insulation: jacket/raincoat, extra layers
- Illumination: flashlight, lantern, or headlamp
- Fire: matches, lighter, fire starters
- Repair kit: duct tape and multifunctional tool
- Nutrition: at least an extra day’s supply of no-cook, nutritious food
- Hydration: water and/or means of water purification
- Emergency shelter: tent, space blanket, tarp, bivy (as in, emergency shelter for a sleeping bag)
Customized First Aid Kit
This is geared to making sure you supplement your first aid kit with things that aren’t standard that you may need.
For example, if you have the medication you need to take consistently you will want to have them also in the kit you carry just in case.
Items like the following are good to bring with you:
- Medications
- EpiPen
You should go through and make sure you have a spare in your kit just in case as it may save your life or someone else on the trail!
Proper Sun Protection
Many hikers don’t realize how draining constant sun exposure can be on a hiker, even on overcast days!
Make sure to protect yourself from prolonged sun and UV exposure through long sleeve shirts, hats, sunscreen, and good chapstick.
Addition Water Purification
For me and most, you are filtering water with a Katadyn or Sawyer while out on the trail, these are very susceptible to cold weather and one hard freeze can destroy them leaving you open to sickness.
Make sure to pack at least a few days’ worth of water purification tablets or other water cleaning methods to ensure you can drink water as this is VITAL to survival when in trouble.
Building Friendships on Trail
While many may start the trail alone or with the intention of staying alone, many will find themselves crossing paths with people. Some of these people will end up talking at length to over a length of the trail and this is how Tramily’s are born.
For many thru-hikers, their hiking friendships last long after the trail is over, as this is someone who knows exactly what you have been through.
A great number of people who continue to hike after the fact will call or reach out to see if their previous Tramily can come on their new trek and explore a new trail and have a new experience.
Keeping Up Contact With Family & Friends
Last but not least, don’t disregard those you have left at home. The people who have known you forever will be interested to hear about your journey and your status, and update them regularly.
If you agree beforehand you can use a device like the Garmin Inreach Mini which has the ability to show your location at regular intervals along with single-click buttons much used as status updates.
Life After the Trail
This I feel is the part many don’t fully prepare for before they leave and through the process of the hike, leaving them to scramble and try to figure it out as it comes at them.
This approach can have its merits and can be successful but some people will fail at it and come crashing down hard and have a rocky road to trying to regain a balance.
I personally feel this is why so many want to go start the next thru-hike once they complete the first, building your life again is now the unknown and it causes panic in your chest that many would rather not want to face.
Reintegration to Society
Remember way upon this post where I mentioned you wanted to have a $1000+ nest egg to come back to, well you have hit the point where you can really use having these funds available.
Once you get back, if you quit your job you will need to find and start the process to get a job, don’t put limitations on this employment and focus on getting moving again and building an income.
Next, if you sold your house or got out of a lease you will need to find a place to stay, so hopefully, you can find a place with the money you saved before, I know this changes if you lived in New York versus somewhere in Nebraska.
You will want to re-enter society in the same way you slowly moved into hiking, take some baby steps as the world may seem far busier than you remember it as you were able to slow your life down to normal on the trail.
There are always some issues re-adapting to life for many who leave to thru-hike when they come back, a huge one is just depression-like episodes that have come to be known as PTD or Post Trail Depression.
Managing Post Trail Depression
When you finish the trail you may experience a sense of severe sadness that is likened to depression and can be painful and in some cases totally debilitating.
I figured I would place some of my favorite YouTubers’ expressions below on how they approached it and that you should always reach out if you feel you can’t escape the pressures.
We will follow that up with a video that presents some quality tips for adjusting and combating the PTD feelings that may bother you.
What is Next?
For many, this may have been a once-in-a-lifetime trip, something that would push them to learn more about the world along with more about themselves and where they fit in the world.
This is a rare opportunity in the world we live in, to have 6 months of time to see people from every walk of life and truthfully find yourself, not the shell of you that you normally present to the world at large.
Some will move back into their work life, having an amazing life experience to pull from when life becomes challenging. Others will go on to do closer, more intimate trails and not look to be gone for 6 months ever again, choosing instead for 1-4 week-long trips.
A small portion will have found they aren’t interested in society as a general rule, these hikers will work long enough and hard enough to fund the next hike, these ones have found their place being free and each person is correct.
There is no right path after your thru-hike, in the 6 months you are out there you will find out a lot about yourself and much of you may change, this isn’t a bad thing but people at home may not understand it as they didn’t take the chance on themselves, keep that in mind!
Leave a Comment