
This website uses affiliate links which may earn a commission at no additional cost to you. As an Amazon Associate I earn from qualifying purchases.
When you’re new to thruhiking, the idea of sleeping under just a tarp might seem intimidating or even crazy. But for thousands of experienced hikers, tarp camping represents the sweet spot of ultralight backpacking: maximum weight savings with surprising comfort and versatility.
What Is a Backpacking Tarp?
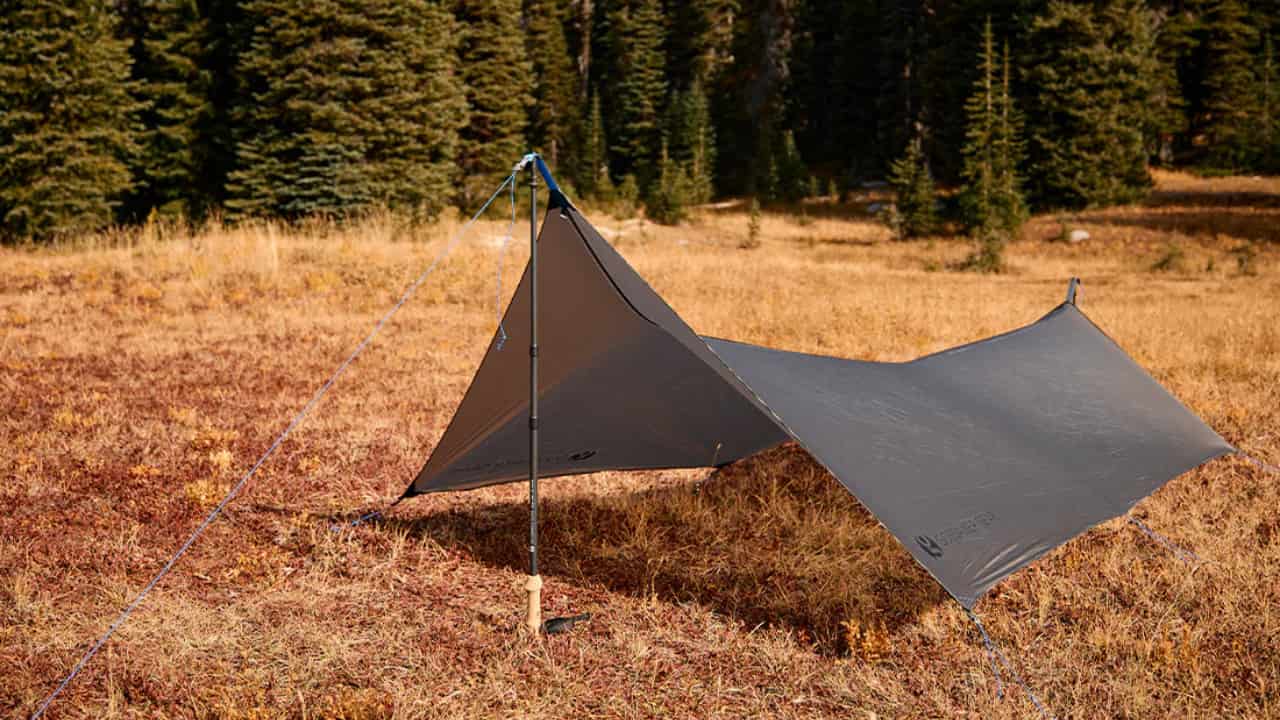
A backpacking tarp, like the HMG Flat Tarp or Gossamer Gear Solo Tarp, is simply a waterproof sheet of fabric designed to keep rain and weather off you while you sleep. Unlike tents with floors, poles, and zippers, a tarp is just the roof. You pitch it using trekking poles, trees, or lightweight stakes, creating a overhead shelter that protects you from the elements while leaving the sides open or adjustable.
Think of it as a minimalist roof over your head. That’s it. No complex setup, no heavy poles to carry, no enclosed space. Just you, your sleeping bag, and protection from rain and sun.
Why Choose a Tarp Over a Tent?
Weight savings are the primary reason hikers go to tarps. A quality backpacking tarp typically weighs between 6 to 16 ounces, while even lightweight tents start around 24 ounces and go up from there. On a thruhike covering thousands of miles, every ounce matters. Carrying a tarp instead of a tent can save you a pound or more, which translates to less fatigue and easier miles.
Versatility is another major advantage. With a tarp, you can adjust your shelter to match conditions. Need maximum coverage during a storm? Pitch it low and tight. Beautiful evening with no rain? Set it high for views and airflow. You can even use your tarp as a sun shade during breaks or as a communal gathering space for trail friends.
Better ventilation means no condensation issues. Tents trap moisture from your breathing and body heat, leaving you wet in the morning even without rain. Tarps offer superior airflow, keeping you and your gear drier in humid conditions.
Cost effectiveness also appeals to budget-conscious hikers. Quality tarps cost significantly less than comparable tents, often $100 to $200 compared to $300 to $500 for ultralight tents.
Understanding Tarp Shapes and Sizes
Tarps come in several configurations, each with distinct advantages.
Flat tarps are rectangular sheets offering maximum versatility. You can pitch them in dozens of configurations depending on terrain, weather, and available anchor points. They require more skill to pitch well but reward you with adaptability. Common sizes range from 5×9 feet for minimalists to 8×10 feet for comfortable coverage.
Shaped tarps include designs like the A-frame cut (catenary cut) and hexagonal tarps. These save weight by eliminating excess fabric while maintaining coverage where you need it. They’re easier to pitch than flat tarps but offer fewer configuration options.
Size considerations depend on your height and gear. As a baseline, you want at least 6 to 8 feet of length and 8 to 9 feet of width for adequate coverage. Taller hikers or those who want to keep packs under the tarp should size up.
Essential Components of a Tarp System
A tarp alone won’t keep you comfortable. You need a complete shelter system.
Ground protection comes from a footprint or groundsheet, typically made from lightweight materials like Tyvek or Polycro. This creates a barrier between you and the wet, dirty ground. Budget option: painter’s plastic or Tyvek house wrap from hardware stores works perfectly.
Bug protection is critical during warmer months. An inner net tent or bug bivy creates a mesh enclosure under your tarp, keeping mosquitoes and ticks away while maintaining the weight advantages of tarp camping. Some hikers use treated clothing and headnets instead, though this requires higher tolerance for insects.
Guylines and stakes secure your shelter. Most tarps need 4 to 8 stakes depending on pitch style. Carry at least 50 feet of lightweight guyline cord for various pitches and configurations. Mini groundhog stakes offer excellent holding power at minimal weight.
Trekking poles serve double duty as tarp supports, eliminating dedicated poles. This is why tarp camping pairs perfectly with hikers who already use poles for stability and joint protection.
Materials and Features to Consider
Silnylon (silicone-coated nylon) is the most common tarp fabric. It’s lightweight, affordable, and durable but stretches when wet, requiring occasional guyline adjustment during rain. It also absorbs some water, adding minor weight.
Silpoly (silicone-coated polyester) doesn’t stretch when wet and absorbs less water than silnylon. It costs slightly more but offers better performance in wet conditions.
Dyneema Composite Fabric (formerly Cuben Fiber) represents the premium option. Incredibly strong and waterproof at minimal weight, DCF tarps weigh as little as 5 ounces but cost $300 or more. The material is less durable than silnylon against abrasion.
Look for reinforced tie-out points where you’ll attach guylines. Quality tarps have bartacked or reinforced corners and ridgeline attachment points. Catenary curves along edges help the tarp pitch taut without requiring excessive tension.
Learning to Pitch Your Tarp
Start with the basic A-frame pitch. This classic configuration works in most conditions and requires minimal skill. Stake out one end, run a ridgeline to the opposite end (using poles or trees), and stake out the corners. You’ve created a simple angled roof.
The half-pyramid or C-fly pitch uses one trekking pole and works well against directional wind. Stake the windward side low and tight to the ground, prop up the opposite side with your pole.
Storm pitches maximize coverage by bringing the tarp edges all the way to the ground, though this reduces livable space. Porch mode pitches create an extended overhang for weather protection with more interior room.
Practice different pitches at home before your trip. Set up your tarp multiple times in your backyard until you can pitch it quickly in various configurations. When weather threatens on trail, you want this to be second nature.
Site Selection and Setup Tips
Choosing the right spot matters more with tarps than tents. Look for naturally sheltered areas behind trees or rocks that block wind. Avoid low spots where water pools during rain. Check overhead for dead branches (widowmakers) that could fall during storms.
Orient your tarp with the low end facing prevailing winds. Position yourself so rain runs away from rather than toward your sleeping area. If possible, find a slight slope to encourage drainage.
Pitch tight and low in bad weather. A taut pitch sheds rain and wind better than loose fabric that flaps and channels water. In calm conditions, pitch higher for views and comfort.
What Beginners Should Know Before Trying Tarps
Start with good weather. Your first tarp camping experiences should happen during dry, calm conditions. This builds confidence and skill without the pressure of a storm.
Expect a learning curve. Your first few nights might feel exposed or awkward. This is normal. Most hikers need several trips to feel truly comfortable under a tarp.
Bring a backup plan initially. On your first trips, consider carrying a bivy or even a lightweight tent until you trust your tarp skills.
Weather awareness becomes critical. Tarp camping requires paying attention to forecasts and being prepared to adapt your pitch or find better shelter if severe weather approaches.
Not every location works for tarps. High alpine areas with no trees, extremely exposed ridges, or places with severe weather may require enclosed shelters. Know your limits.
The Bottom Line
Backpacking tarps offer experienced and beginning hikers alike a path to ultralight freedom without sacrificing protection. The weight savings, versatility, and cost benefits make tarps attractive for thruhikers committed to going light and fast.
Success with tarp camping comes from understanding your shelter system, practicing pitches before you need them in the field, and choosing appropriate conditions as you build skills. Start simple, practice often, and you’ll discover why so many long-distance hikers eventually ditch the tent in favor of a simple sheet of fabric overhead.
The tarp life isn’t for everyone, but for those who embrace it, the rewards go beyond weight savings to include a deeper connection with your environment and the satisfaction of mastering a fundamental backcountry skill.