
This website uses affiliate links which may earn a commission at no additional cost to you. As an Amazon Associate I earn from qualifying purchases.
When you’re planning your first thru-hike, ticks probably aren’t the first thing on your mind. You’re thinking about stunning views, physical challenges, and the adventure of a lifetime. But these tiny arachnids are one of the most common health hazards you’ll face on trail, and understanding how to deal with them is essential for every hiker.
Understanding the Threat
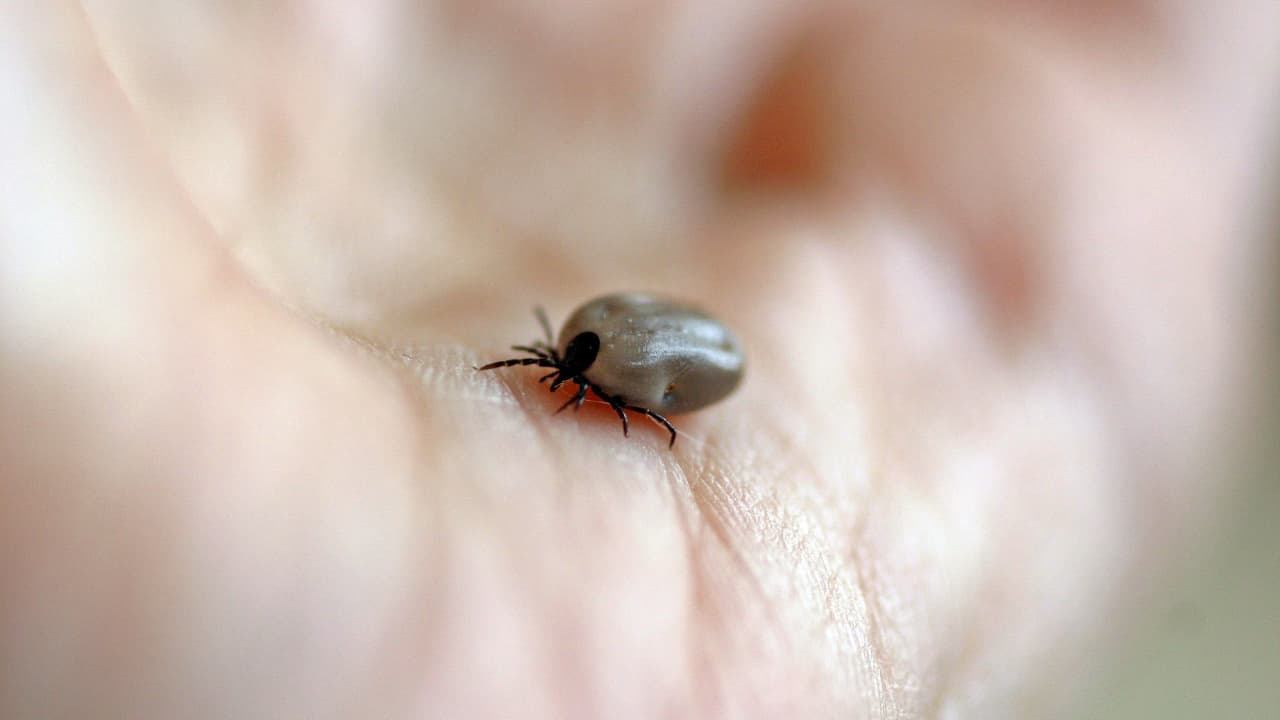
Ticks are not insects. They’re arachnids, related to spiders, and they feed on blood. What makes them particularly dangerous isn’t just the bite itself, but the diseases they can transmit. Lyme disease is the most well-known, but ticks also carry Rocky Mountain spotted fever, anaplasmosis, ehrlichiosis, and babesiosis, among others. These illnesses can cause serious long-term health problems if left untreated, including chronic joint pain, neurological issues, and in rare cases, death.
On popular thru-hiking trails like the Appalachian Trail, Pacific Crest Trail, and Continental Divide Trail, you’ll encounter tick habitats regularly. The peak tick season runs from April through September, which overlaps perfectly with prime hiking season. This means you need to be prepared for daily tick encounters throughout most of your hike.
Where Ticks Live and How They Find You
Ticks don’t jump or fly. Instead, they practice something called “questing.” They climb onto grass, brush, and low vegetation, then extend their front legs and wait for a host to brush past. When you walk by, they grab onto your clothing or skin and begin searching for a good feeding spot.
You’ll encounter ticks most frequently in:
- Tall grass and overgrown trail sections
- Brushy areas where vegetation touches the trail
- Leaf litter in wooded areas
- Areas with high deer or rodent populations
- Transition zones between forests and fields
The danger zones on trails include overgrown approach trails in spring, grassy balds, sections through farmland, and any area where the trail maintenance has fallen behind. Even well-maintained trails can harbor ticks in the surrounding vegetation.
The Clothing Myth: What Actually Protects You
Here’s a critical fact many new hikers don’t realize: ticks can and will bite through thin, tight-fitting clothing. Your favorite hiking leggings, lightweight running shorts, and thin synthetic shirts offer minimal protection. Ticks have specialized mouthparts designed to penetrate skin, and thin fabric stretched tight against your body won’t stop them.
Effective clothing strategies include:
Loose-fitting pants are your first line of defense. When fabric hangs away from your skin, ticks have difficulty getting purchase to bite through. Many experienced hikers wear lightweight hiking pants even in warm weather for this reason.
Tucking your pants into your socks looks dorky but works. This forces ticks to climb up the outside of your clothing where you can spot them, rather than allowing them direct access to your legs. Pair this with knee-high socks or gaiters for extra protection.
Light-colored clothing makes tick spotting dramatically easier. A dark brown tick on olive green pants is nearly invisible. That same tick on tan or light gray fabric stands out immediately, allowing you to remove it before it reaches your skin.
Permethrin-treated clothing is a game-changer. Permethrin is an insecticide that bonds to fabric and kills or repels ticks on contact. You can buy pre-treated clothing or treat your own gear with spray-on permethrin. A single treatment lasts through multiple washes and provides protection for weeks. This is one of the most effective tick prevention methods available.
Daily Tick Checks: Your Most Important Routine
On a thru-hike, tick checks need to become as automatic as filtering water. You should perform thorough tick checks at minimum twice daily, ideally once during your lunch break and again before getting in your sleeping bag at night.
How to perform an effective tick check:
Start with a visual inspection of your clothing. Before you even begin checking your skin, look over all your clothes, especially around ankles, waistbands, and seams. Brush off any ticks you find.
Check your entire body systematically. Ticks prefer warm, moist areas. Pay special attention to:
- Behind your knees
- Around your waistband and underwear line
- Armpits and under sports bras
- Behind your ears and along your hairline
- Belly button
- Groin area
- Between your toes
Use a small mirror or your phone camera to check areas you can’t see easily, particularly your back and the back of your thighs. Hike with a partner and check each other, especially for scalp and back-of-the-body ticks that are nearly impossible to spot alone.
Run your hands over your skin. Sometimes you’ll feel a tick before you see it, especially in hairy areas. They feel like a small bump or irregularity on your skin.
Check your gear too. Ticks can hide in your pack, sleeping bag stuff sack, or clothing. A quick shake-out and visual check of your gear during tick checks can prevent a hitchhiker from biting you later.
When You Find an Attached Tick
Despite your best efforts, you’ll probably find an attached tick at some point on a long trail. Don’t panic. Most tick-borne diseases require 24 to 48 hours of attachment before transmission occurs, so finding and removing ticks quickly dramatically reduces your risk.
Proper tick removal technique:
Use fine-tipped tweezers or a specialized tick removal tool. Grasp the tick as close to your skin as possible, right where the mouthparts enter. Pull straight up with steady, even pressure. Don’t twist or jerk, as this can break off the mouthparts in your skin.
Don’t use folk remedies like petroleum jelly, nail polish, alcohol, heat, or anything else designed to make the tick detach on its own. These methods don’t work reliably and may cause the tick to regurgitate into your wound, increasing disease transmission risk.
After removal, clean the bite site with soap and water or an alcohol wipe. You can apply antibiotic ointment if you have it. Save the tick in a small container or ziplock bag with the date and location written on it. If you develop symptoms later, this helps doctors identify which diseases to test for.
Watch for symptoms over the next 30 days. These include:
- Bull’s-eye rash (but only 70-80% of Lyme cases show this)
- Fever and chills
- Headache and muscle aches
- Fatigue
- Swollen lymph nodes
If you develop any of these symptoms, get off trail and see a doctor immediately. Early treatment with antibiotics is highly effective for most tick-borne diseases, but delays can lead to serious complications.
Building Your Tick Management Kit
Every thru-hiker should carry:
- Fine-tipped tweezers or tick removal tool (the small card-style removers are lightweight and effective)
- Small ziplock bags for storing removed ticks
- Permethrin spray for treating clothing
- DEET or picaridin repellent for exposed skin
- Small mirror for self-checks
- Alcohol wipes for cleaning bite sites
These items weigh just a few ounces but provide comprehensive tick protection throughout your hike.
The Bottom Line
Ticks are a real health hazard on trail, but they’re also a manageable one. With the right clothing choices, consistent use of permethrin, daily tick checks, and knowledge of proper removal techniques, you can dramatically reduce your risk of tick-borne illness. Prevention and vigilance are your best tools. Make tick checks part of your daily routine, just like setting up your tent or treating your water, and you’ll be able to focus on the incredible experience of thru-hiking rather than worrying about these tiny threats.
Thousands of hikers complete thru-hikes every year without serious tick problems because they take these precautions seriously. Now you have the knowledge to be one of them. Stay vigilant, stay protected, and enjoy your hike.