For a long-distance hiker on the Appalachian Trail, many hikers’ concerns focus on keeping electronic devices charged as you use them for multiple functions.
The answer? Well, it depends on what kind of electronic device(s) you have and where along the entire trail you are. We will cover these topics in this blog post!
You can charge electronics like a phone in two ways on the trail, by a battery or solar charger or from an outlet in a quick pit stop or overnight stay. These options allow you to carry on for 3-7 days between towns without losing device use as long as power use is monitored.
Overall, I can express that the hikers who use much power on the trail take far more ZEROs and NEROs than those who don’t burn through power.
So managing your power consumption and controlling it should be a focus to cut down on overall thru-hike costs.
Most Hikers Carry Gear That Requires Power on the Trail
As technology levels advance, the number of items you can bring that require power continues to expand.
Below, I just wanted to quickly go over the most common electronics that people will carry on the trail, what they are helpful for, and why.
Cell Phone (Most Popular Multi-Function Device)
Let’s face it: in today’s world, your cell phone is the most important device for a hiker as it runs software, like Farout’s Guide to the Appalachian Trail, along with being able to perform an incredibly diverse range of functions which include:
- Phone
- GPS
- Camera
- Music and Movie Player
- Email Access
- Web Browser
- Book Reader
- Weather Forcast
- Voice Recorder
- Trail Journal
Although none of these are necessary to walk the Appalachian Trail, they make it much more pleasurable and take up less room than bringing every item for each purpose.
Cell phones can also be utilized to contact shuttle drivers, arrange for car or van transport, reserve hotel rooms and hostel beds in town while you’re still on the journey, or, worst-case scenario, in an emergency when you require assistance.
Watch
Whether you are a fan of things like the Apple Watch or more technical watches like those from Garmin watches have always been popular devices just now they have become electronic devices as well.
Many provide tracking with GPS to help track the exact path taken, the elevation gains and losses over the trek, and other helpful information that some people love to have about their hikes.
Personal Locator
This is a tremendous safety device and whether you choose to rock the crowd favorite InReach Mini, BivyStick, Zoleo, or a host of other manufacturers it makes sense to carry a locator to help in the case of an emergency.
In addition, most of these devices allow friends and family to see your current location along with allowing you to text family or fellow hikers even when you have no cell signal to let them know you are safe and sound and to relay information better.
Headlamp
Yes, many headlamps run on batteries alone taking away some of this need for “charging” but these come with limitations as to batteries and needing to now carry more weight in batteries themselves.
For me, it was easier to convert to a Nightcore NU-25 headlamp, which allows it to be charged like any other electronics I carry.
To me, this allows all my gear to be managed by the same method and helps cut down more random items in my pack.
Camera (GoPro, Osmo, or Similar)
For most people, their thru-hike is going to be a once-in-a-lifetime trip. It would be a shame not to record it to reminisce later on, as these cameras are incredibly light they are easy to bring with you.
In addition, these cameras are straightforward to charge, the same as a phone and other devices.
Methods to Reduce Phone Power Consumption
We should all be able to admit that our cell phones will be the biggest consumer of energy on the trail, that is unless maybe you are a YouTuber or are using a camera to record large video content on the Appalachian Trail.
For the rest of us, though, you want to manage your phone consumption daily as this is what you will use to see if you need to carry an additional charging source and what size that charging source may need to be to fill your needs.
Finding ways to maximize this battery life and extend the battery power of your phone is a huge focus for hikers looking to carry less weight and minimize their overall base weight for their backpacking trip.
Put Your Device on Airplane Mode
One key thing to extending the battery life on any mobile phone is to put the phone in airplane mode. This disables the wireless antennae and the cell antennae which leads to massive power savings.
For most, this is more than fine as you will use GPS for any apps like FarOut, and for listening, you should have been pre-downloading content before heading out on the trail. There is very little need for cell or wireless while on the trail.
Turn Down the Screen Brightness
Taking the screen brightness down from being automatically controlled based on lighting to manual control allows you to take the bright setting down to where you can see, saving precious energy on your phone battery.
Turn Your Device on Low Power Mode
Another key is that you can use low post mode. This disables all unnecessary apps and background processing on your phone, ensuring longer battery life and extending use.
If you want to push it even further, it would be even better to power the phone off and take in nature and just take in the experience for a bit.
Keep Your Device Near Room Temperature
For any devices that run on a battery, there can be issues when they exceed a temperature and losses in overall charge when the temperature gets too low (I sleep with mine on those cold spring or fall nights).
Exceeding around 95°F or 35°C can cause permanent device damage, which will, in the end, shorten or limit the battery capacity; in addition, any cold temperature under 62°F or 16°C could cause issues also.
For the best battery length and life, the temperatures are perfect between 62°F to 72°F which is also 16°C to 22° C. This temperature range will help extend the battery and ensure the best performance.
Packing the Right Gear to Charge Your Device
Here is where the fun starts. There are many ways to charge your devices while in town or along the trail.
Each has its benefits and drawbacks, but all could be the right way to manage your hike in your way. Personally, I carry a Nitecore or two for a battery pack for the best cost to all-around performance.
I recently bought a pair of Nitecore NB10000’s, or check out my review, as it is incredibly lightweight at only 5 ounces and is perfect for dropping weight but maintaining performance.
Battery Pack, Battery Bank, or Power Bank
A staple on the trail now, these batteries allow you access to power while on the trail. They come in many sizes and styles which allow you to carry exactly the size needed for your trail needs.
For many thru-hikers, a 5,000 mAh portable battery pack may allow enough recharges for a 3-5 day trip when the devices aren’t used consistently.
Then you need to increase this as you use devices or as the trips lengthen to provide enough power.
When I hike with cameras I will typically bring a 10,000mAh to 20,000mAh battery which will allow me multiple recharges to ensure enough ability to record and save my videos for the family to see afterward.
Extended Battery Case
Nearly all phones have a case made by manufacturers with an extended battery, and since this is the majority of power use this may be all you need to get from town to town without additional batteries.
The only tradeoff is that the weight is always in hand or in the pocket and can’t be in the backpack stored away, but for many, this is the simplest way to give their phones a longer life at a small cost.
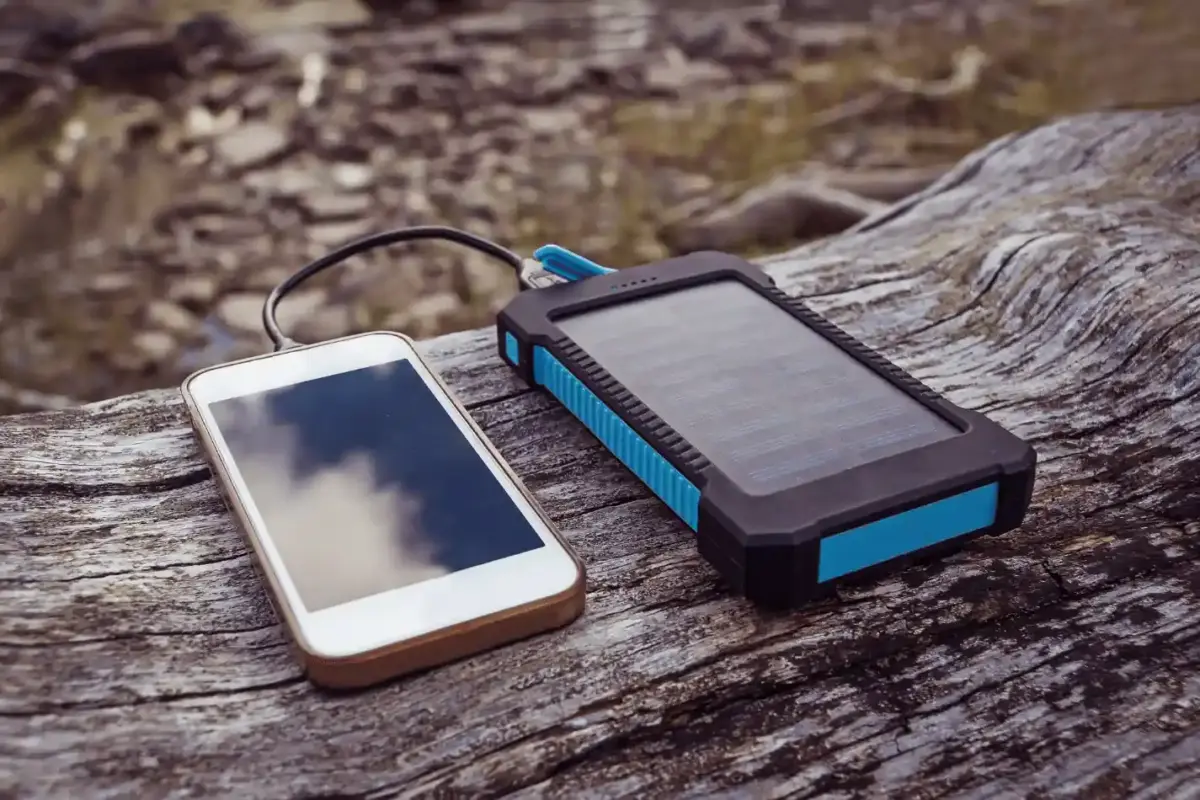
Solar Chargers
On the Appalachian Trail, there are many places where things like solar chargers will be less than optimal.
As you live and hike more often than not inside a “green tunnel”, or surrounded by trees and shade, than out in the blazing sunlight solar power is somewhat limited.
The good thing for many of the current generation of solar-based chargers is they are getting lighter and lighter, making them a very lightweight addition depending on the section you will be traveling on.
Some can be simply mounted onto the outside of a backpack and run a simple cable inside to allow the charging of a battery backup within the pack allowing you to charge a battery pack while on the go.
Wall Quick Charger
When thru-hiking your time is exceedingly limited in town, much of this time when on a NERO, planning to leave after only short periods in town to refeed and restock yourself for the next leg of the hike.
Many of these NEROs may change into ZEROs where you have to stay overnight if you cannot charge your devices fast enough in the time in town you have.
This is why you need to have a quality wall charger, preferably with a quick charge functionality that helps devices and power banks charge faster.
My favorite has always been Anker for high-quality manufacturing and long lifespans while being very small and lightweight for a single-wall charger port like this Nano.
They also built what I feel may be a game-changer for me in that it is a wall charger and a power bank in one. This unit is quite intriguing and is my next purchase for my continual pack optimization.
Extra Batteries
This will be for the devices that run on batteries and can’t just be recharged with a power bank. These can be replaceable batteries, which are cheaper and easier to find, or rechargeable batteries.
The issue with batteries is adding extra weight and keeping them separate from the charged and non-charged while possibly needing to carry a battery charger that can only be used while in town to recharge.
Finding Outlets to Charge Along the Way
One thing you can do is watch for power outlets along the way. These can be found in many places like grocery stores or convenience stores, which will help you get enough power to make it into town or just a little further.
If your device is low on battery and the next stop isn’t for another few days, this might not work. When you come across a power outlet, though, note that it does cost someone money to get power and to ask permission to use the outlet.
The best way to optimize for this kind of charge and go would be to charge your phone from a power bank heading into the place with the outlet, and then once in town, you are focused on charging just the power bank as much as possible.
Storing Electronics & Gadgets in a Pack
For electronics, you must always be cautious about water, as many days on the trail can feature rain. Managing a simple way to keep your electronics dry should be a focus.
For myself, I purchased Dyneema bags from Hilltop packs that are labeled with a battery, as this helps me to understand at a glance what I put into the bag. I would suggest always getting a roll-top bag and not a drawstring to maintain this water safety.
You can always go the inexpensive route and use a ziplock bag, but I worry that I will snag it and make a hole in the plastic, leading to a catastrophic failure of my gear without my knowledge.
YouTube Video On Electronics on Trail
Final Thoughts on Electronic Device Power on the Trail
Charging devices while on the Appalachian Trail can be a challenge, but there are some tips and tricks you can use to make it easier. One is bringing an extra battery for your device or power bank, if possible so that when one goes dead, you have another with enough juice in it to get through the day.
Another suggestion would be using a solar charger, which helps maximize sunlight exposure and charge up batteries quickly without having to carry around heavy equipment like solar panels themselves.
Lastly, we recommend keeping all of your electronics in waterproof bags or pouches at all times and always remembering to bring along a cable just in case you find somewhere where someone has set out their charging station just for hikers passing by!
Leave a Comment