When I started rebuilding my hiker lifestyle and getting back outside, I began by buying inexpensive backpacking gear, generally heavier and less packable, which meant a larger backpack to store them.
The longer I have been in this hobby, the more replacements I have done work to make purchases and find the lowest weight and most packable items, so what is ultralight backpacking?
This change is frequently labeled as an “ultralight backpacker” when your goal is to lighten up by finding ultralight gear that helps get your base weight as low as possible without causing safety or other concerns.
One thing I can say is as I get older, the weight I want to carry decreases but also the more money I have to make these changes, it is worth it, in my opinion, to drop pounds from your back as long as you can financially absorb it.
This led me to want to dive headlong into the ultralight backpacking philosophy and why it should be a focus over time for any long-distance thru-hikers to achieve, as it helps make miles, enjoy miles, and decrease injury risks.
The Ultralight Backpacking Philosophy
If you’re new to ultralight backpacking gear, this post will serve as a helpful introduction to the key concepts, jargon, expressions, and weight-saving techniques. We’ll also cover some useful online tools to help you get started.
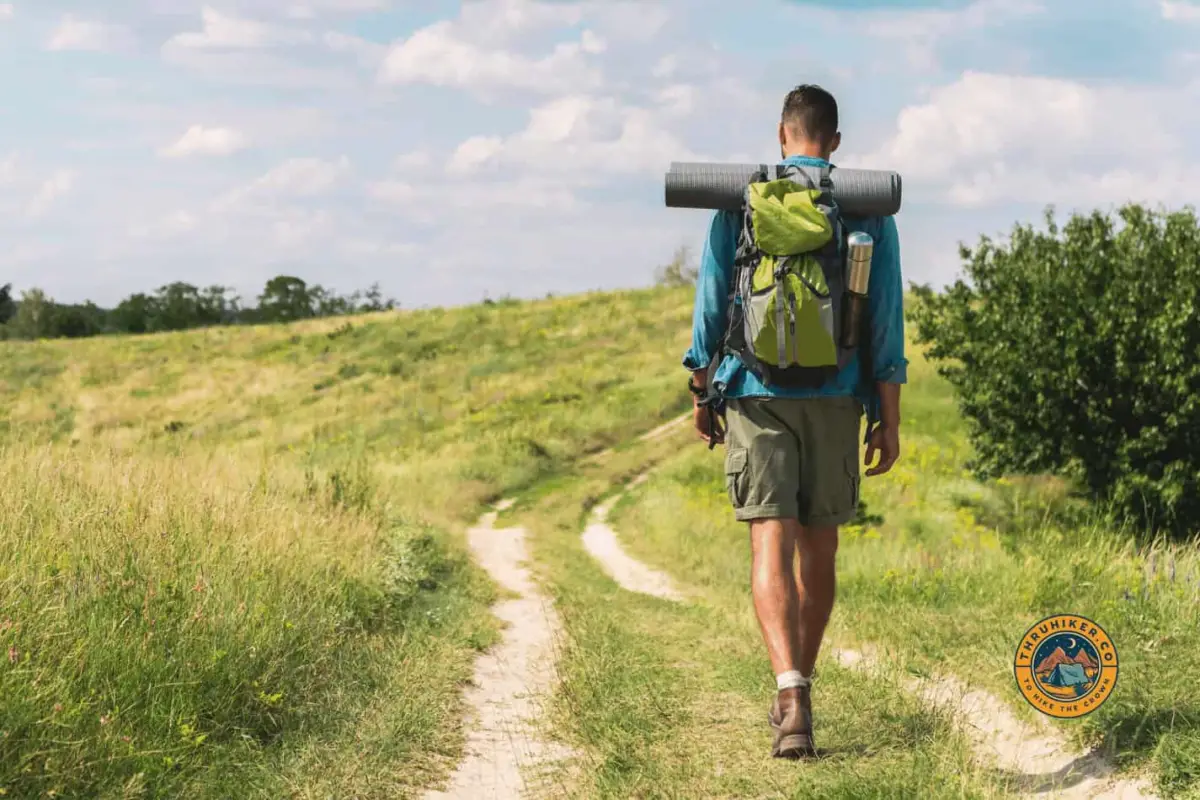
Ultralight backpacking is a mentality that focuses on lightening your overall base weight before heading out on a hike.
In the ultralight world of backpacking, the focus is on finding lightweight or ultralightweight gear that can be used for multiple purposes, like trekking poles for hiking and your shelter, allowing you to drop the weight tent poles would bring.
Ultralight is a Philosophy
At the core of ultralight isn’t danger or being unprepared but more how to ensure you are fully prepared but using the most out of what you bring when multipurpose wins over many single-purpose items.
Ultralight backpacking is much more of a philosophy. The goal is not to skimp on gear or save as much money as possible; it’s about finding what you need and what will most benefit your particular needs and situation.
It’s also about looking for ways to maximize the use of your gear and decrease the amount of gear you have to carry while providing full functionality in your ultralight pack.
It’s worth noting that ultralight backpacking is not about minimalism or having nothing, but it does mean being mindful about what you bring and what you need for a particular outing.
The point is to ensure what you bring with you is truly necessary and use what you bring to the best of your abilities.
There is no one-size-fits-all approach to being an ultralight hiker, as what works for one person may not work for another.
Finding what will work best for you and your individual needs and goals is key.
This philosophy can reduce your overall gear weight and make your time outdoors more enjoyable.
One thing to keep in mind when you are considering what to bring is that you should always consider what the “worst case” scenario would be and what gear you would need to handle it safely and comfortably.
Key Concepts and Defining Going Ultralight
The definition of ‘ultralight’ that most thru-hikers will follow is: carrying the lightest pack by bringing only the essentials needed to be safe on a given trip.
Achieving this requires focusing on two essential concepts: how much your pack weighs and what you can do to make it lighter.
Tracking and Measuring Pack Weight
Managing your pack weight is a process. Many who don’t weigh everything and don’t actively track the gear in their pack will find their actual base weight may be vastly different than their perceived weight.
This is why I am a massive fan of using online lists, as they can help you track over time, show you where gear could become lighter, and get you tremendous value.
Let’s discuss why and how.
Why You Should Use Gear Lists
When building out a huge list of the gear, you need to track the changeable variables, if you don’t have an active list with realistic weight, you have little actionable detail on dropping weight.
In addition, when searching for valuable help from others, providing them a simple way to open and view your gear and help give you items that you could drop, merge, or lighten is essential.
This is why I love to use Lighter Pack, it is a free site that allows you to add gear easily and put them into categories so you can see how your weight is distributed, which makes changes simpler.
Another key part of this tool is that the shareable link can easily be changed into native weights for each person viewing to see what they care about, from pounds, ounces, and grams.
How to Measure Your Pack Weight
This is where the base weight comes in, and it provides you a flat measurement of the gear you will ALWAYS be carrying.
Things like food, water, and clothing all change over a thru-hike, so using them in measurement leads to no basis to work from.
Base Weight
Base weight is the overall weight of your belongings plus the backpack minus the weight of any consumables like gas or food.
This figure does not change even if you’re only planning a short trip; instead, it allows for a more accurate comparison between people’s lists and provides a goal to aim for when packing.
Consumables Weight
Anything that becomes lighter throughout your journey is known as consumable weight (CW). Fuel, water, and food are all things whose weights fall under this category.
While these commodities can have a sizable impact on how much your pack weighs, their weight depends on factors like the trip duration, so they shouldn’t be used to compare different gear lists.
Listing items according to whether they’re consumables or not is an option Lighterpack offers its users.
Total pack weight
The total weight of your backpack and all of its contents at the beginning of your trek, including consumables like food and water.
This total measures how comfortable a given pack style will be for the intended trip.
This is especially important when considering which backpack to buy or what style (frameless vs. frame), as they can carry different maximum weights.
Skin-Out Weight
SOW (skin-out weight) is another metric used to index weight. It’s the total weight of everything you carry on your person, not including consumables.
The point of this metric is to keep people from cheating, for example, when they put equipment in their pockets or wear extra layers of clothing to reduce their base weight on paper.
Total Weight
Your total weight includes everything you bring when hiking and camping on a backpacking trip.
Over time, hikers learn how to reduce their weight through practice and experience.
Your base pack weight (BPW) should be small, and you should have various clothing options that don’t weigh much individually (low SOW).
It’s also important to be strategic about the consumables you bring with you, such as food and water.
The most experienced hikers know how to keep their total pack weight relatively low by knowing what they carry.
So the real question is, what’s considered ultralight in understanding?
Defining ‘Ultralight’ by Pack Weight
For most people, this will come down to pack weight, using the base weight as a guideline for your classification.
The main issue with this way of measuring is that this number will vastly change based on the season and elements one may encounter on a thru-hike, as a three-season gear loadout will almost always be lighter than a four-season.
The definition of ‘ultralight’ often neglects other fundamental aspects such as skills, techniques, behaviors, and hiking philosophy that can’t be measured by weight class alone.
So then, what is considered ultralight backpacking weight?
The weight-based approach to base pack weight determines a hiker’s classification. This system is widespread to use but has plenty of painful limitations.
One weight class is not inherently better than another, and hikers should not make drastic cuts to their gear to enter a new weight class.
Weight Class Base Pack Weight
- Traditional > 20 pounds (9.07kg)
- Lightweight < 15 pounds (9.07kg)
- Ultralight < 10 pounds (4.54kg)
- Super-Ultralight < 5 pounds (2.27kg)
The downside to the weight model in defining ultralight is that it isn’t constructive since it does not consider all the factors that should be considered, such as individual needs and the specific trip.
This makes the minimum amount of weight to take on a hike a poor marker for the philosophy itself, as it can highly depend on the individual.
For example, someone who is heavier will need more gear and clothing than someone who is lighter, which means that their pack will weigh more.
This simple way to expose the lopsidedness of the weight method is one of the major problems with using any weight classes as an ultralight marker.
Mentality, Behaviour & Philosophy
With experience, you’ll find that cutting down on weight isn’t only about picking gear to lighten your load.
Once a trip is planned and all conditions are accounted for, experienced hikers can decide about equipment to enhance their hike; weight cuts come second to this goal.
When we question the usefulness of what we carry and weigh everything against specific conditions, that’s ‘ultralight’ thinking.
It’s not just about lightening our pack weight but being strategic with everything we bring on our treks.
Optimize Equipment for Specific Conditions
The goal is to carry appropriate equipment for the terrain and conditions you might encounter.
You can save weight by carrying less gear if you research water availability, temperatures (including nighttime lows), precipitation, elevation changes, biting insect pressure, sun exposure, wind direction, and other factors before each trip.
Before each hike, check the weather and conditions to know what gear to bring. It’s much more dangerous being underprepared than over-prepared.
What Motivates Someone to Become Ultralight?
Why would somebody want to choose an ultralight lifestyle? There are many reasons why people might consider ultralight, but one of the main reasons is that it allows them to hike further and faster than they could before.
When hikers reduce their base weight, they can either increase the distance they’re able to hike or allow them to hike generally at a quicker pace.
While not a necessary change, this can allow a thru-hiker to enjoy the trail more, experience less fatigue, prevent recurring injuries (i.e., back strain, knee pain), and possibly explore more views than they otherwise would.
Increasing Distance and Speed
In general, becoming ultralight helps the backpacker speed up processes, so getting up and breaking camp becomes more simplified and efficient.
This leads to more daylight hours on the trail, often eating breakfast on the go or after a few hours once the body is warmed up and they find a view or reason to stop.
From here on out, they’ll typically need shorter breaks to manage water, restock snacks, or check a map, stopping to make a cooked or more extensive lunch only when the tramily has something pre-planned.
Instead, most will choose to eat snacks throughout the day. Most ultralight hikers usually hike for 10-12 hours straight, focusing on dedicating as much daylight to putting down miles as possible.
Most may hike up to sunset, not choosing to eat dinner until the end of the day. Others may stop and eat, then get some more distance afterward.
Terminology and Expressions
As with most hobbies and pursuits, there is loads of different terminology and some ties back to lighter gear pursuits, but to keep it simple, I have packaged all the terms into a glossary or page of hiker lingo over here.
I would suggest opening this into another tab so you can find and read the words that confuse you, and if I am missing anything, please let me know!
Trimming Weight Through Techniques & Consumables
Now, we can get to the more functional moves to start liberating ourselves of as much weight as possible, focusing on the simplest ways to cut pounds.
We will look first at food and water.
Afterward, we will discuss planning and choosing a suitable campsite, med kits, and emergency needs.
Lastly, we will dive into what kind of gear to consider and what has been weighing us down all along.
Hydration
A core need for all humans is that we can live weeks without food but only days without water. This makes hydration a powerful resource to achieve ultralight goals.
Carrying bottles is what most people will do while also carrying water treatment in the form of tablets, filters, or UV lights.
Carrying Water
Water is the heaviest item you will likely carry, with a liter weighing around 2.2 pounds; most carrying two liters means 4+ pounds of water weight in two little bottles.
Gone are the days of using hard-sided bottles like Nalgene. Also, bladder use is declining for most thru-hikers due to the lack of ability to see how much water you are drinking or have left.
In addition, it can be quite a chore to pull a bladder out to filter into it. Carrying cheap plastic water bottles has become “the way” for thru-hiking.
These are easy to replace on the trail and work well with most filters.
Treating Water
There are several types of water filters to choose from, each with advantages and disadvantages.
The most common method thru-hikers use is a physical water filter with a nanofiber membrane. This filter cleans water from a ‘dirty’ container into a clean one.
While physical filters are the most common, you might consider using UV light or chemical treatment instead if you want a filter that doesn’t require constant replacement or upkeep.
Aquamira is one popular option for a chemical treatment, but it’s not as popular as it can take 20 minutes to hours for the chemicals to make the water safe enough to drink.
UV devices can render viruses inert, but they still weigh more than nano filters, which typically means less use on the trail.
Then there are the extremes, like some ultralight hikers forego water filters and purifiers and instead choose to drink straight from natural sources.
While some waterways present lower risks than others, anyone hiking in any wilderness area risks contracting diseases like giardia or cryptosporidium.
Nutrition
It is an immense topic; maybe a future basics guide is needed as food is expensive, and covering it will not do it the proper justice it deserves.
Instead, here I will focus on the things someone needs as an ultralight hiker where you want the most bang for your buck, macros, micros, and calorie density, and then dive into a cold soaking or no-cook approach.
Macro Ratios
The basics of all food, macronutrients, are used to fuel all our activities, like moving our body, thinking, and healing.
Ultralight hikers must be aware of what their macro ratio should look like when planning meals.
Macros essentially operate as body maintenance (protein), long-term energy (fat/lipids), and short-term energy (carbohydrates/sugars).
With backpacking meals, generally prioritize fat, protein, and carbohydrates.
Fat is preferential to carry as it provides more energy (calories) per gram than the other two options, meaning it is lighter and more valuable for long-duration activity.
One often overlooked item that is equally vital to success is protein. It is the key to sustaining your body and muscles on a long hike, repairing the damage done with hard work daily.
As with most normal day-to-day meals, carbohydrates come in nearly all foods.
Due to this, they aren’t something you need to seek out to add, as your snacks and meals will include many by default as they are good long-shelf-life foods.
Micronutrients
These are sodium, potassium, and magnesium. Each of these is important for electrolyte balance in the body when hiking, and you lose them through sweat.
Sodium is what most thru-hikers are concerned about when it comes to electrolytes.
It helps reduce the risk of cramping and headaches from being overly dehydrated, plus it helps with hunger cravings, which can be a problem on long hikes.
For hikers looking for something simple, adding salt to water or food is enough to help, but there are other options like electrolyte tablets and powders that they can add to their water or meals.
Potassium is the counterbalance to sodium, helping keep the body balanced. This mineral is essential for good health, and foods rich in potassium can help control blood pressure by blunting the effects of sodium. The more potassium you eat, the more sodium you process out of your system.
Magnesium helps to relax the muscles and can be taken either in supplement form or from foods if you plan when selecting what to bring on your hike.
Caloric Density
The main focus of all thru-hikers nutrition choices is caloric density. Caloric density, at its core, is how many calories are present per ounce of food weight.
This is without taking into effect the macronutrients and micronutrients in the foods and is just trying to find the best bang for your buck in weight to energy.
But you can use caloric density to your advantage once you understand the fat and protein content within your food options, with most aiming for approximately 120 calories per ounce.
Cold Soaking or No Cook
While these both sound like each other, they are quite different as no cook involves a focus on foods like tortillas and foods that can be eaten with no preparation at all.
On the other hand, cold-soaking prepares meals that need rehydration to make consumption viable. This means time and can be done while you are on the move.
The main benefit of cold soaking is that it requires minimal fuel and effort, with most meals only needing to sit in a container for 30 minutes to an hour before they are eatable.
Cold soaking container choice matters and there are some things you will need to consider when picking your container: weight, volume, sturdiness, and lid seal.
Read more on cold soaking in our more detailed post – Cold Soaking
The advantage of no-cook is that you can eat immediately without any pre-preparation, allowing instant meal freedom.
My wife and daughter prefer no-cook and cook depending on the outside temperatures, while I have been and will continue to be a cold soaker as I am good with some ramen options and similar meals.
Campsite Selection
Some things are key to a good camp that should be considered, especially with the lighter gear you will be carrying.
Some key considerations include proclivity to condensation, storm viability, and the environment in general, which need to be thought through.
Condensation
Condensation is a problem for campers, especially when using single-wall ultralight tents.
You can limit or avoid condensation by camping on hard surfaces like asphalt or rocks, which help the tent floor to dry, or by ensuring there is good airflow around your campsite and tent.
Additionally, the closer you are to bodies of water, the more condensation you can expect, as the heat from your body and breath with the cold and humidity outside forms the condensation and drip potential.
Environmental
Following LNT principles, there are places where you shouldn’t ever camp and stick to more established sites to limit the impact in general.
If you’re expecting to camp, understand the area to see what environment exists. Some areas have sensitive meadows and ecosystems that can be damaged if you don’t follow the proper rules.
Weather
If a storm is even slightly probable, take more care in choosing your campsite.
Set your camp away from exposed areas like ridges, above tree lines, or on overlooks that protect you against wind, rain, and thunderstorms.
Find sites within trees and behind rocks or other features that will block the prevailing wind direction if possible.
If no safe place exists, look at the possibility of hiking out of the poor location, especially when worried about safety.
First Aid Kit Management
Going ultralight doesn’t mean not thinking about what your kit must contain for your safety.
You should always carry a first aid kit, no matter what weight you are carrying, with bandages, gauze, alcohol wipes, and other items that can help in an emergency.
Also, consider what else could be added to the first aid kit, such as sunscreen or bug spray, depending on your trip needs.
If you want deeper reading on first aid kits, I have a post specifically talking about building your kit here.
Quick Patch & Repair Kits
Most sleeping pads will come with patches to help seal any holes, while backpack repairs can usually be fixed with some tape temporarily or, if you have them, a small needle and thread.
However, if you want to go deeper on what you should carry for repairs, I have another post here that covers what items I keep in my repair kit.
Most tents will also come with patch kits; high-end tents like the Zpacks Duplex and other Dyneema Composite Fabric (DCF) tents will have a specific patch to match the fabric.
Multi-Use Equipment
The key to lightening your load overall is to have items that can do more than one task for you, and this is why a cooking pot is also a coffee cup and why I bring a spork to eat.
This is why trekking pole tents are favored for shelters and are favored more by lightweight backpackers, as the hiking poles can serve for balance while hiking and as the tent frame when camping.
Selecting Ultralight Gear to Drop the Pounds
Now to managing the real weight, how can you bring down the pounds and cut down what you carry with you.
Sleep System
What you use to get your rest, is comprised of two core gear, the sleeping pad for ground insulation and the sleeping bag or backpacking quilt for holding in warmth.
There is also the choice of down or synthetic insulation, for most going ultralight the only true choice is down as it packs down much more for the same warmth value.
As a general rule, ultralight sleeping bags and quilts weigh less than two pounds. Quilts are usually the lighter option between the two, although there are some pricey exceptions.
Sleeping Bags
When you think of backpacking, sleeping bags usually come to mind. Also called “mummy bags”, they are enclosed bags that use down or synthetic insulation.
You can find ultralight sleeping bag options from various brands and most of them utilize shell materials that are very light along with top-notch insulation.
Backpacking Quilts
Quilts serve the same purpose as sleeping bags, but they don’t have a backside to reduce weight and material.
In a standard sleeping bag, the insulation below you gets compressed and lost over time, making it less effective in keeping you warm.
However, quilts are not colder than sleeping bags by default and generally weigh much less.
Sleeping Pad
People usually have different preferences when it comes to choosing a sleeping pad. Most ultralight sleeping pads are made out of closed-cell foam or they need to be inflated using your breath.
There are two primary reasons why people use sleeping pads:
- The first and glaringly apparent reason is for comfortability
- The second reason is that it acts as a barrier against the cold ground temperature
Sleeping pads use an “R-Value” which is a rating of insulative performance from the ground. For more you can dig into R-Values here in my basics post.
The higher the R-Value assigned to a specific material the greater amount of heat it will help to retain instead of losing it to the ground, helping to maintain the warmth while you sleep.
Shelter System
You have many options for a shelter as an ultralight hiker, the most common being tents as you may have expected but there are many choices to explore tarps and hammocks.
Tent
Everyone loves tents and is very used to them, with Dyneema fabrics there is full tents coming in at under a pound, like this Zpacks Plex Solo at an amazing 13.9 ounces or 395 g!
For many backpackers, tents are the go-to shelter option. Tents vary widely in terms of configuration, fabric, pole setup, and occupancy. The most polarizing difference between types of tents is usually whether they are single or double wall.
Double and single wall tents come in two types of design: “free standing” or “non-free standing.”
A free-standing tent is self-supported and doesn’t need to be staked down to stay up. They’re usually easier to put up than non-free-standing tents.
Hammock
Often a bit heavier than a similar costing tent, a hammock can provide some of the most comfortable sleep any hiker could dream of.
For most though having to learn a hammock system feels incredibly complex with needing a hammock, suspension, ridgeline, tarp, and bug net.
Once I used a hammock though I found it hard to decide to go to ground anymore and always look to if I can bring my hammock for any trip.
Tarp
Tarps are one of the lightest methods for shelter you could bring, the trick being to learn the size you need and the many setup methods you can use to provide yourself defense from the elements.
This can take loads of time and effort, along with leaving you exposed to bugs and animals which leads people to look towards pairing tarps with bivy’s.
Bivy
These are a great way to add a layer of protection while using an ultralight setup, basically being a tied-up shelter with a minimal bathtub and built-in bug netting.
The biggest issue with bivys is the lack of space and condensation that could build up during the night therefore many use a tarp-bivy combo.
Clothing System
Clothing systems are going to consist of many layers, from the base layer to an outer warm layer, these layers will help you regulate your temperature no matter what the weather throws at you.
If you want to dig into clothing in particular I recommend my post on clothing for thru-hikes where you can learn more about each layer.
Footwear & Trekking Poles
Footwear used to be hiking boots, these were common in days past or trail runners which have come into fashion in the last decade.
Trail runners came more into fashion with the overall drop in heavy packs, whereas in years past you would have 50+ pound backpacks where you needed greater support.
Trekking poles help you to walk and take some of the load off your legs and feet while on the trail. They also can be used to support yourself when climbing over logs and rocks, as well as provide stability in rougher terrain.
Lastly you have camp shoes, for many this has become Crocs due to their lightweight and easy to put on and off, but many will choose to avoid an additional pair and just open laces wide on their normal shoes.
Gear Mods
These would be the little mods to cut those extra grams, like people who choose to cut the handle off their toothbrush to cut weight, it’s these small details that come together to make what is labeled an ultralight setup.
Gear mods can become addictive, once you start finding ways to make your gear lighter it’s hard to stop modifying and tweaking new gear or well used pieces of gear!
Leave a Comment